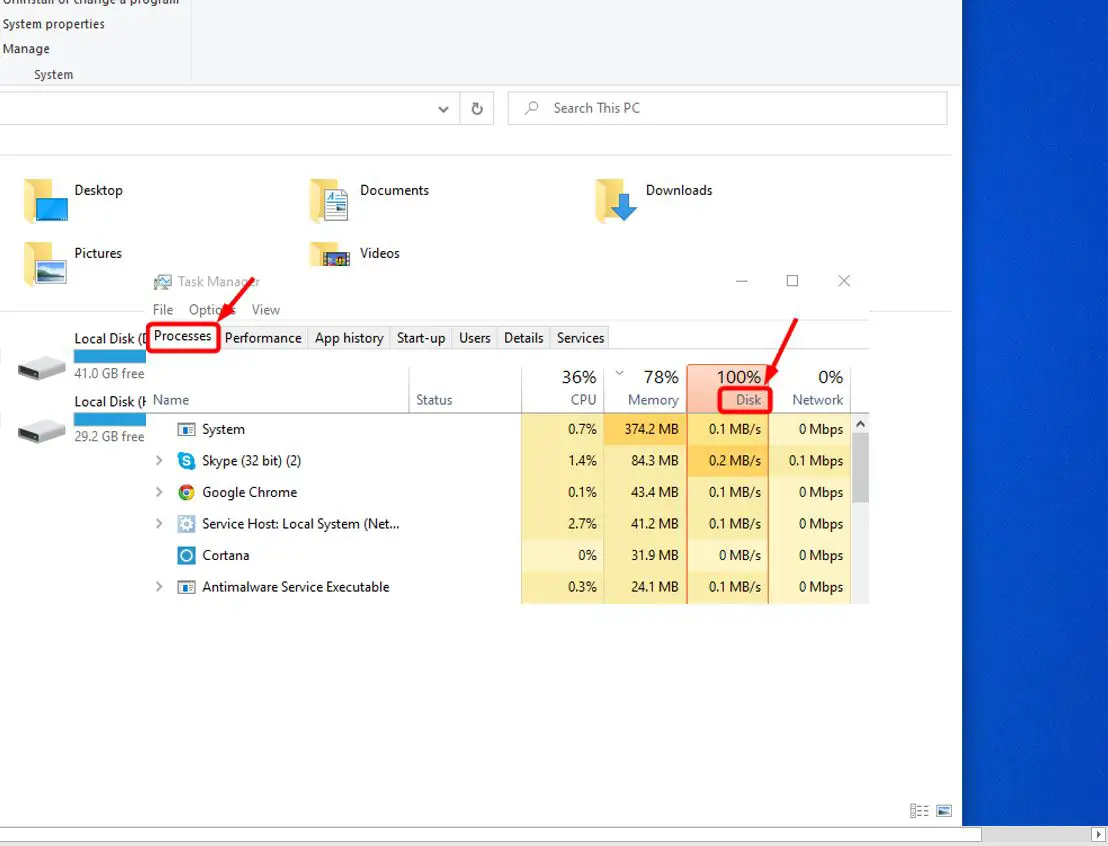
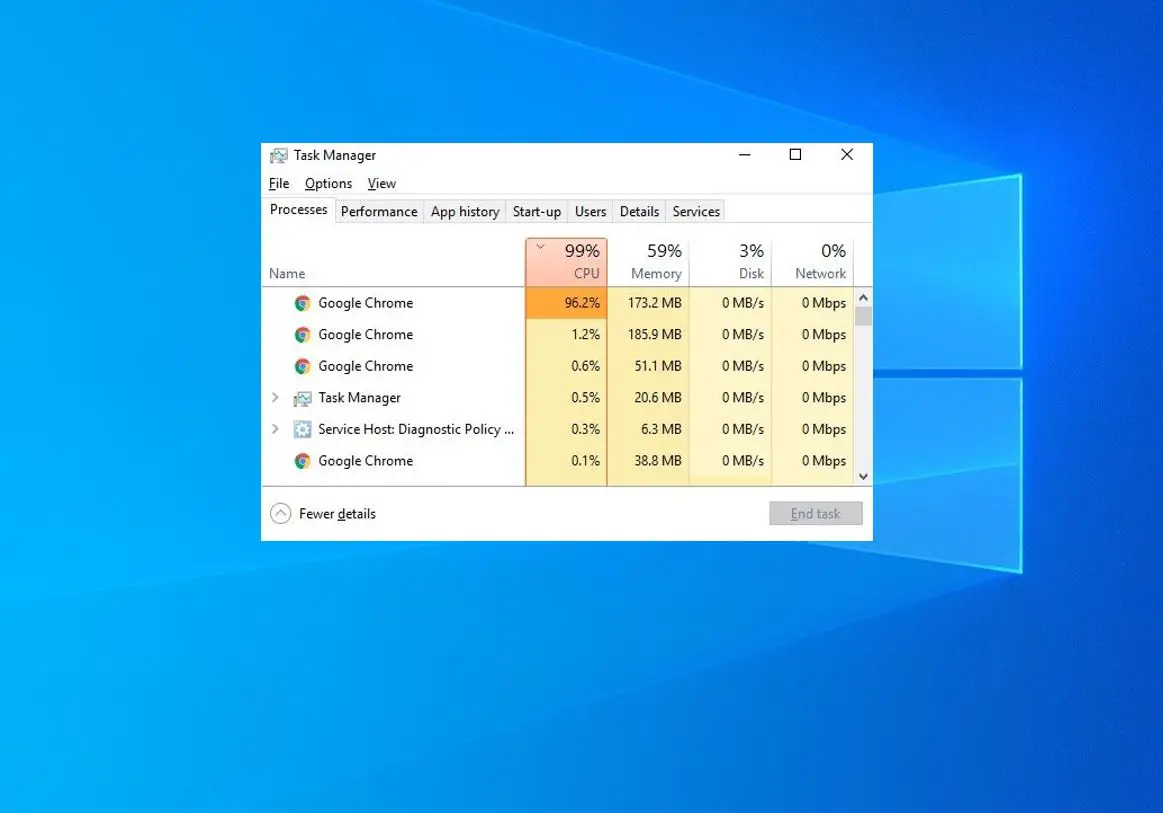
Did you notice the Windows 11 computer lagging after the Windows update? Programs take a few seconds to respond and checking in the task manager the disk usage is at the top. So, what is causing Windows 11 100% disk usage? Too many programs launch at startup, system infected with viruses or malware, outdated drivers, incorrect virtual memory or disk drive error are some common reasons that cause this issue. If your PC not perform well or Windows 11 high disk usage, apply the solutions listed below to fix the issue.
Contents
Windows 11 High Disk Usage
If the disk usage of your computer continues at a high level, the first thing we recommend, is restart your PC. When you restart the computer, it forces the Windows OS to reload, thus fixing any minor bug or glitch responsible for the error.
Perform a full system scan with the latest updated antivirus or antimalware software. Again, some users report uninstalling the third-party antivirus helps them fix the high disk usage problem on Windows 11.
In addition, try to disconnect any external media storage devices (like – external HDDs, pen drives, etc.).
Disable windows search
For most users, windows search running on the background consumes a heavy amount of hard disk processing power and that results in Windows 11 high disk usage problem. Let’s try to stop or disable the Windows search service following the steps below and check the disk usage status.
- Open command prompt as administrator,
- Then run the command net.exe stop Windows search to stop the Windows Search from running in the background.
Now again open task manager and check the disk usage status, if it comes down stop the Windows search service permanently following the steps below. But if the disk usage remains the same at high skip to the next solution.
- Press Windows key + R, type services.msc and click ok
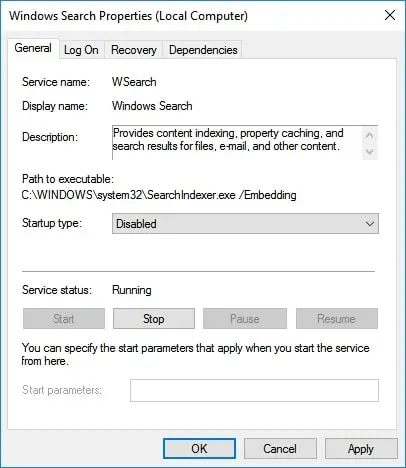
- This will open the Windows service console, scroll down and locate the Windows search service. Right-click on it then select properties,
- Now change the Startup type to Disabled and click on “Stop” if the service is ‘Running’.
- Finally, click on “Apply” and “OK” to apply this change.
Reset Virtual Memory
Virtual Memory is one of the most useful features that uses HDD space and allows you to instantly free up RAM’s storage space. Some chances misconfigured virtual memory settings may have caused this issue. Let’s reset virtual memory to its default setup and check if this helps reduce disk usage.
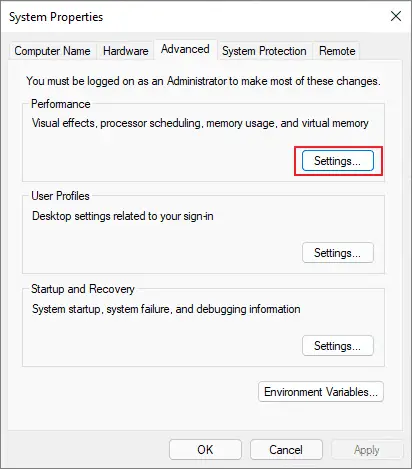
- Press the Windows key + R, type sysdm.cpl and press enter key,
- This will open the system properties window, switch to the “Advanced” tab and then tap on the “Settings” button placed in the “Performance” section.
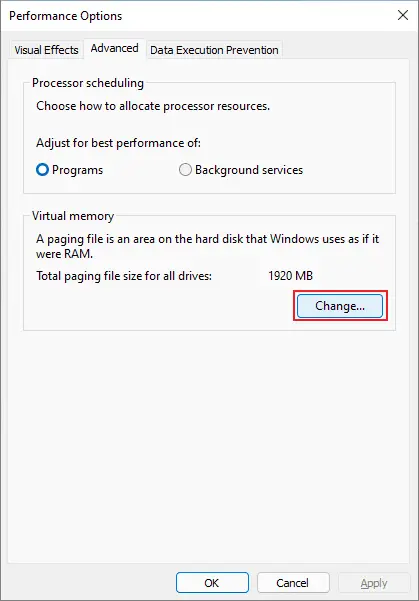
 On the next window, move to the Advanced tab and then tap on “Change” under virtual memory.
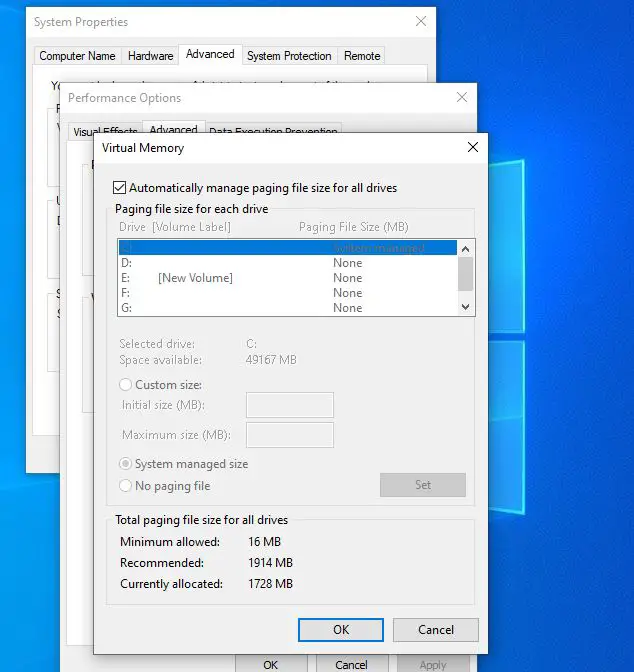
- And finally, check the “Automatically manage paging file size for all drives” option.
- Hit the apply and OK button to save the recent changes.
After resetting the virtual memory, clear the temp files and obsolete data following the steps below.
- Press Windows key + R, type %temp% and hit the enter key.
- Press Control + A to select all files, right-click on the selection and then select “Delete” to get rid of temp/junk files stored on your device.
- Finally, reboot your computer and check the status of Windows 11 100 disk usage.
Disable SysMain Service
SysMain is previously known as SuperFetch a Windows service that helps preload apps that you frequently use to enhance the system performance. It also keeps track of the apps used on a specific day of the week or any other systematic pattern and loads them accordingly. Well, this service considerably enhances the performance but sometimes it’s known for High disk usage as well. Disable the sysmain service following the steps below and check if it helps lower the disk usage in windows 11
- Press Windows key + R, type services.msc and click ok
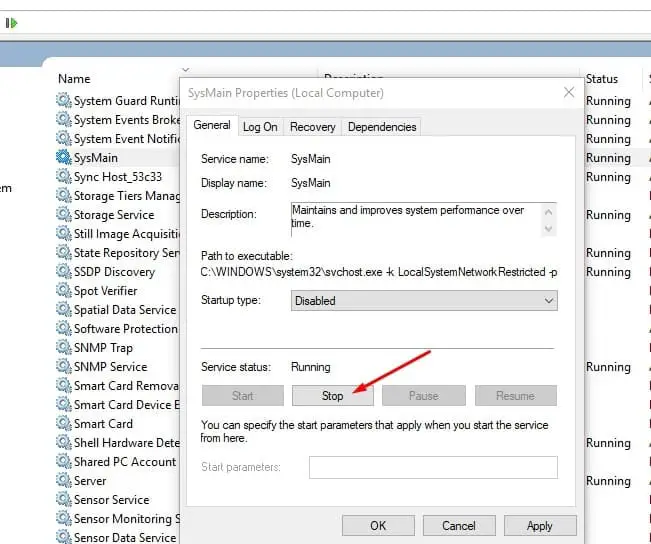
- This will open the Windows services console, scroll down to locate SysMain service right-click on it select properties,
- change the startup type disable and stop the service next to service status.
- Finally, click Apply and ok at the bottom to save the changes and reboot your computer.
- Now check the status of the Windows 11 100 disk usage problem.
Change Power Options to High Performance
Some users report that changing the power options to High performance helps them fix the high disk usage problem on Windows 11.
- Open settings using Windows key + I, go to system then power & sleep from the left.
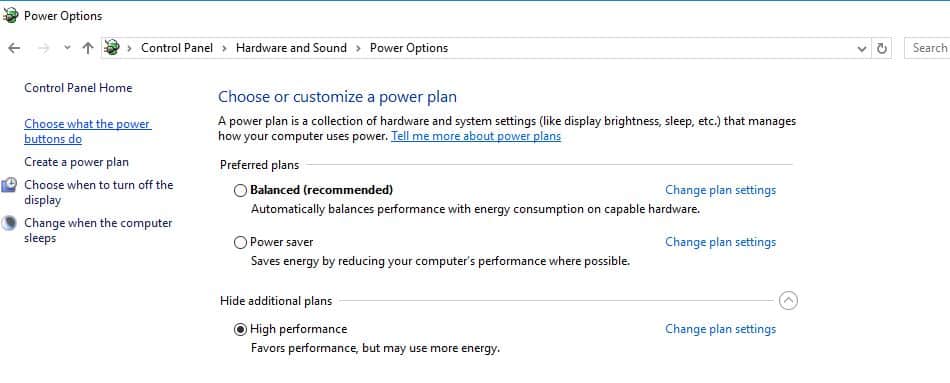
- Now click the “Additional Power Settings” option placed on the right side.
- Here select the High-performance radio button then click on the “Change Plan Settings” option.
Disable Windows Notifications
This is another method reported by users who experienced the same problem.
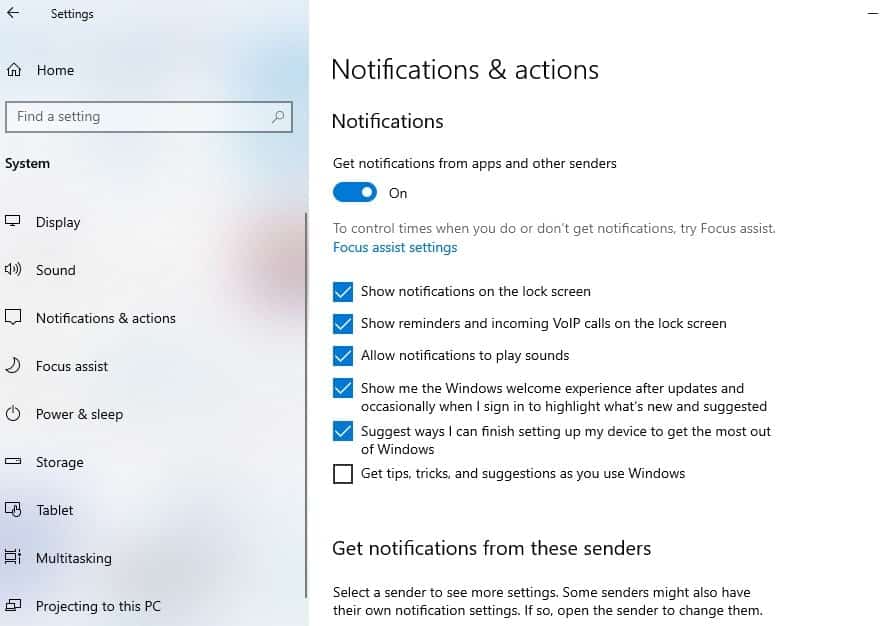
- Open settings using the Windows key + I then click on system,
- Go to Notifications & actions, uncheck the Get tips, tricks, and suggestions as you use Windows.
Perform Clean boot
There are chances third-party apps or startup services eat up system resources, Clean boot windows help you start your system without the interference of any third-party apps. Start Windows 11 clean boot state and check the high disk usage status.
- Press Windows key + R, type msconfig and click ok
- This will open the system configuration window, select the Selective startup radio button and checkmark the option “Load system services “.
- Next go to the services tab, checkmark on hide all Microsoft services,
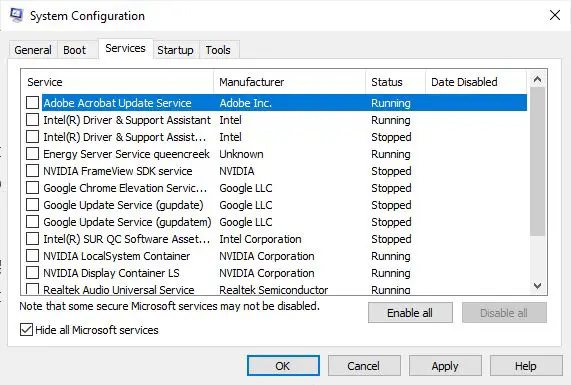
- All the system services will disappear and all third-party services will be selected, finally click on disable all
- Move to the startup section then click on the open task manager link
- Here locate all unwanted applications that AutoStart with the system, right-click on it select disable.
- Click apply and ok then reboot your system. Now check if the disk usage comes down or not.
Fix the StorAHCI.sys Driver
Yet another solution probably helps fix the High disk usage problem on Windows 11.
- Press Windows key + R, type devmgmt.msc and click ok, to open device manager.
- In the Device Manager window, look for the “IDE ATA/ATAPI Controllers”. Tap on it.
- Right-click on Standard SATA AHCI Controller and select Properties.
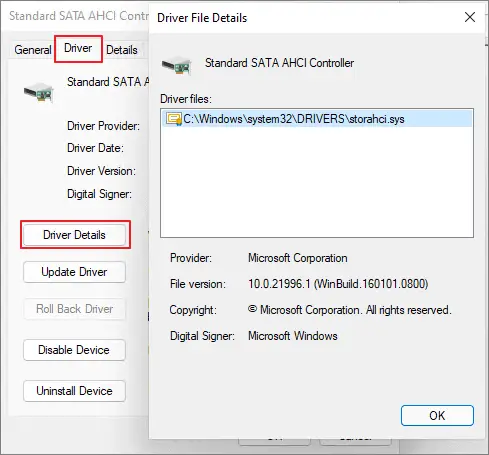
- In the driver properties window, switch to the “Driver” tab, then click on the “Driver Details” button.
- Now check if you see a file named “storahci.sys” in the window. If yes, then you will have to disable it from the registry.
- Tap on OK and close this window.
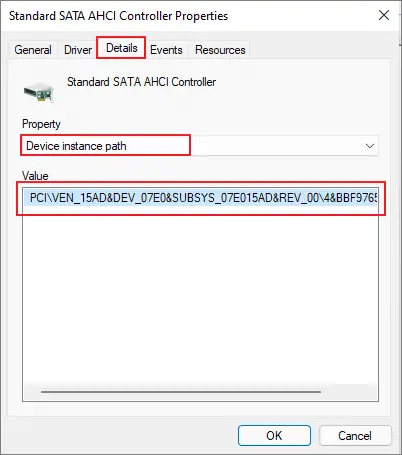
- Head back to the “Standard SATA AHCI Controller” properties window, and move to the “Details” tab.
- Select “Driver path Instance” and then copy the location path listed under “Value”.
- Now press the Windows key + S type regedit and select the first result.
- This will open the Windows registry editor, navigate to the following path HKEY_LOCAL_MACHINE\System\CurrentControlSet\Enum\PCI\(AHCI Controller) \Device Parameters\Interrupt Management\MessageSignaledInterruptProperties
- Double-tap on the MSISupported file. Enter “0” in the Value data field. Hit the OK button.
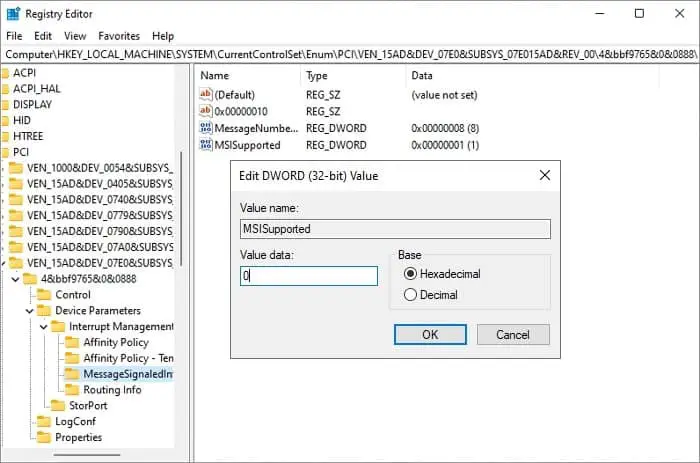
After performing the above-listed set of steps, restart your computer, now open Task Manager and check if you still see high disk usage on Windows 11.
Perform a Disk Check
If none of the above solutions work for you, your last resort is to check the disk drive for errors. You can run chkdsk in Command Prompt to check and try to fix the problem.
- Open the command prompt as administrator,
- type command chkdsk c: /f /r /x and press enter key,
- type Y and press enter when it asks to schedule disk check on next start
- close the command prompt and restart your computer.
- This will scan the disk drive for errors and try fix them, Let the scanning process complete 100%
- It will restart your computer automatically, now check the disk usage status.
Again, Poor contact with the SATA cable can also force the disk to work harder than usual to have the information go through. We recommend check with reconnect or replacing the SATA cable.
Also read:
- Solved: 100% Disk usage in new laptop running Windows 10
- Configuration system failed to initialize on Windows 10 (Solved)
- Solved: Critical process died BSOD on Windows 10
- Defined Relationship Between Network Security and Internet Security
- 7 solutions to fix Steam content file locked error on Windows 10

