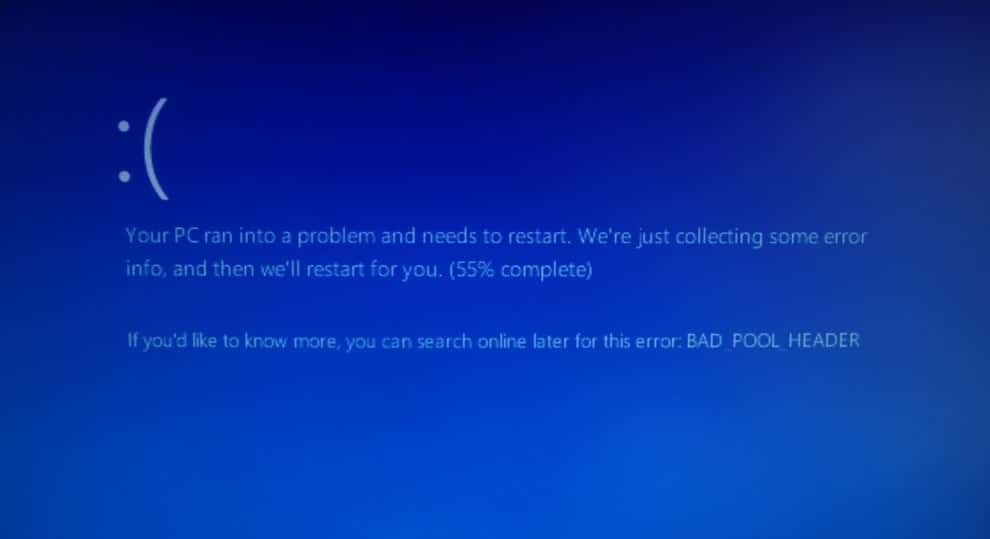
The “BAD_POOL_HEADER” stop code (0x00000019) on Windows 11 is a type of memory management error that indicates that something is wrong with the allocation or deallocation of memory pools. It means your computer is having trouble allocating enough memory to properly run an application, typically because the memory pool is corrupt. Memory pools are regions of memory that are reserved for different purposes, such as drivers, applications, or the operating system. This Bad Pool Header error usually occurs after installing new hardware or software that is incompatible with your PC. This article explorer, common reasons for the BAD_POOL_HEADER error and how to fix it with some simple solutions.
Bad Pool Header Error Windows 11
There are many possible causes for the Bad Pool Header error, but some of the most common ones are:
- Incompatible or outdated device drivers can lead to memory pool corruption.
- Issues with hardware components, such as malfunctioning or incompatible devices, can trigger this error.
- Corruption in system files or errors on the disk can contribute to the Bad Pool Header error.
- Incorrect settings or configuration adjustments might result in memory pool issues.
- Physical memory problems, such as faulty RAM modules, can lead to pool header issues.
Depending on the cause of the error, here are different solutions that you can try to fix the Bad Pool Header error.
Remove External Devices
External devices, such as USB drives, printers, or external hard drives, can sometimes conflict with the system and lead to memory pool issues. Whenever you experience Windows 11 blue screen error you should first disconnect external devices and reboot your PC.
- Ensure your computer is fully powered down before disconnecting any external devices.
- Unplug USB drives, external hard drives, printers, scanners, or any other peripheral devices connected to your computer.
- Check if your internal devices are properly connected and seated in their slots.
- Power on your computer without the external devices connected.
See if the Bad Pool Header error persists after removing the external devices. If the error no longer occurs, you can reconnect devices one at a time to identify the specific component causing the issue.
Boot your system into Safe Mode
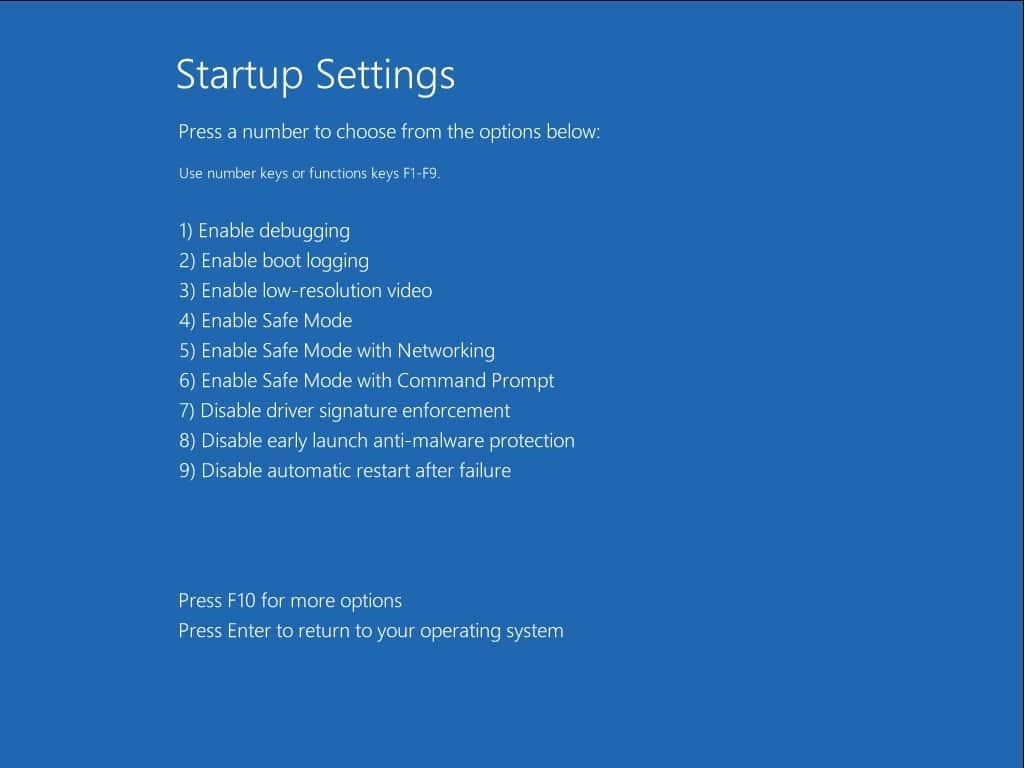
Safe Mode loads the operating system with minimal drivers and services, helping to identify if the issue is related to third-party drivers or software. If due to this Bad Pool Header error (0x00000019) system restarts frequently you should boot into safe mode to troubleshoot the issue.
- On the Windows sign-in screen, press and hold the Shift key while you select Power > Restart.
- After your PC restarts to the Choose an option screen, select Troubleshoot > Advanced options > Startup Settings > Restart.
- After your PC restarts, you’ll see a list of options. Select 4 or F4 to start your PC in safe mode. Or if you’ll need to use the internet, select 5 or F5 for Safe Mode with Networking.
Update Your Device Drivers
One of the most common causes of the Bad Pool Header error is faulty or outdated device drivers, especially if you have recently installed new hardware or software on your PC. To fix this, you need to update your device drivers to the latest version that is compatible with Windows 11.
Outdated or incompatible drivers can lead to memory pool corruption. Updating them ensures optimal functionality and compatibility.
To check if the error is caused by a faulty drive, run an automatic driver update or manually update the drivers to the latest available versions. Install the latest drivers for any newly installed hardware device. If no new hardware has been installed, make sure you have the latest drivers for the below devices.
- Video card
- Network Adapter
- Any removable or external disk drive
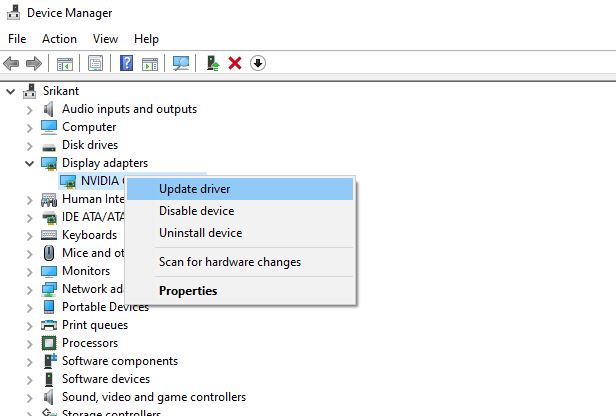
To manually update a driver, follow these steps:
- Right-click on the Windows 10 Start menu and select Device Manager.
- This will display the All Installed Device Driver list.
- Look For Any Driver with yellow tingle Right-click on it, select Update Driver Software.
- Then follow on-screen instructions to install the latest driver version.
You can update the device driver manually by visiting the manufacturer’s website and downloading the correct driver for your device and operating system. Alternatively, you can use a driver updater tool that can automatically scan your PC for outdated or missing drivers and install them for you.
- Identify critical hardware components (graphics card, network adapter, etc.).
- Visit the official websites of the respective manufacturers.
- Download and install the latest drivers.
- Consider using third-party tools like Driver Booster to automate the updating process.
Disable Fast Startup
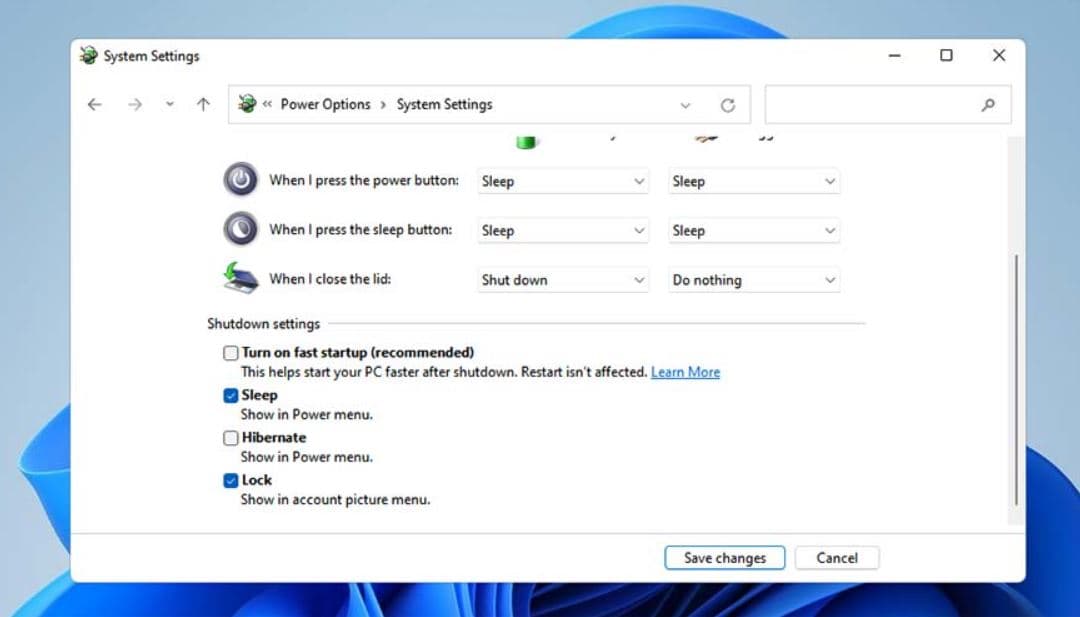
Fast Startup is a feature in Windows 10 and 11 that allows your PC to boot up faster by saving some system information to a file when you shut down. However, this feature can also cause some issues with memory pools and lead to Bad Pool Header error on Windows 11.
To Disable Fast Startup Feature
- Press Windows key + R, type powercfg.cpl and click ok
- Click on Choose what the power buttons do on the left side.
- Click on Change settings that are currently unavailable.
- Now Scroll down and Uncheck the box next to Turn on fast startup (recommended).
- Click on Save Changes and restart your PC.
Disable Windows Search
Windows Search is a service that allows you to search for files and apps on your PC. However, it can also consume a lot of system resources and cause memory pool issues.
- Press the Windows + R keys to open Run dialog box.
- Type services.msc and click OK.
- Find Windows Search in the list of services and double-click on it.
- Change the Startup type to Disabled and click on Stop button.
- Click on Apply and OK and restart your PC.
Run Memory Diagnostic Tool
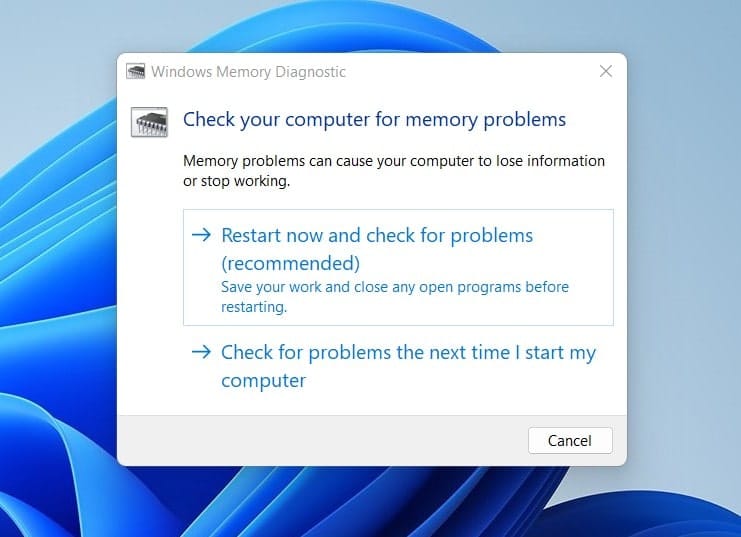
Issues with RAM, such as faulty modules, can lead to memory pool errors. Running the Windows Memory Diagnostic tool helps identify and address potential problems with the system’s memory.
Running the Windows Memory Diagnostic tool helps identify and address potential problems with the system’s memory.
To Run the Memory Diagnostic Tool
- Press the Windows + S keys to open the Search box.
- Type memory and click on Windows Memory Diagnostic.
- Click on Restart now and check for problems (recommended).
Your PC will be restarted and check for your memory problems. It may take some time to complete the scanning process, wait until 100% complete the process Then after Windows will restart Windows. You can check the memory Diagnostic tool Test Results from here.
If any errors are found, you may need to replace your RAM modules.
Malware Scan and Security Software
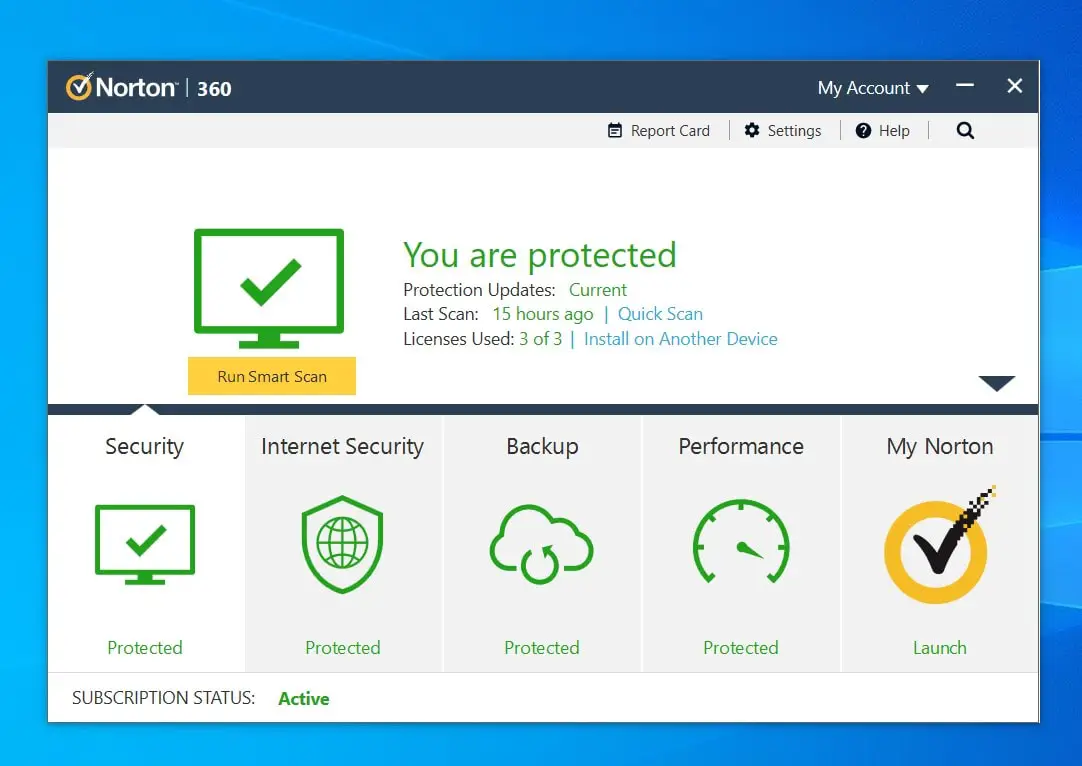
Malware infections and conflicts with security software can compromise system integrity, potentially causing memory pool errors. A thorough malware scan and proper configuration of security software are crucial for a secure system.
- Use a reputable antivirus or anti-malware program to conduct a comprehensive scan.
- Ensure that security software is configured to work harmoniously with the operating system.
- Consider running regular scans to prevent future issues.
Install latest updates
Regularly updating the operating system ensures that the system is equipped with the latest security patches and stability fixes. This helps prevent various errors, including memory pool issues.
- Run Windows Update to check for and install the latest updates and patches.
- Enable automatic updates to keep the system up to date automatically.
Also, Make sure that the drivers of your hardware are updated:
Sometimes outdated or damaged system drivers can generate Blue Screens of Death error. This error is directly related to hardware or driver so updating system drivers could fix the cause of the STOP error.
Check for corrupted System files
System files are integral to the functioning of the operating system. Corruption in these files can lead to various errors, including the Bad Pool Header. Running the System File Checker (SFC) repairs corrupted files, promoting system stability.
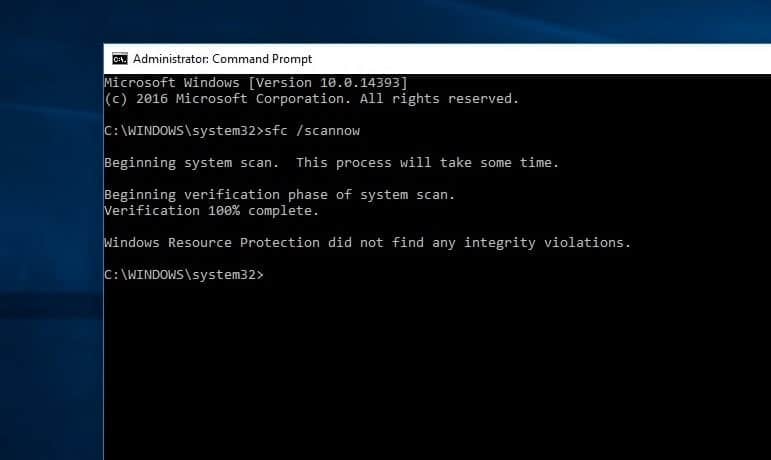
- Open Command Prompt as an administrator.
- Run the command sfc /scannow.
- Allow the tool to scan and repair corrupted system files.
This Will start scanning windows for corrupted / Missing important system files. If found any SFC utility will restore them from a special cache folder located on %WinDir%\System32\dllcache. You only have to wait until 100% complete the scanning process then restart Windows. Then after check BAD_POOL_HEADER blue Screen error is solved.
Check Disk drive Errors
It is also possible that the bad pool header error could be related to bad hardware (e.g. bad memory or bad hard drive). Before assuming that either of these are bad, we suggest running a hard drive and RAM diagnostic test to check if either is bad.
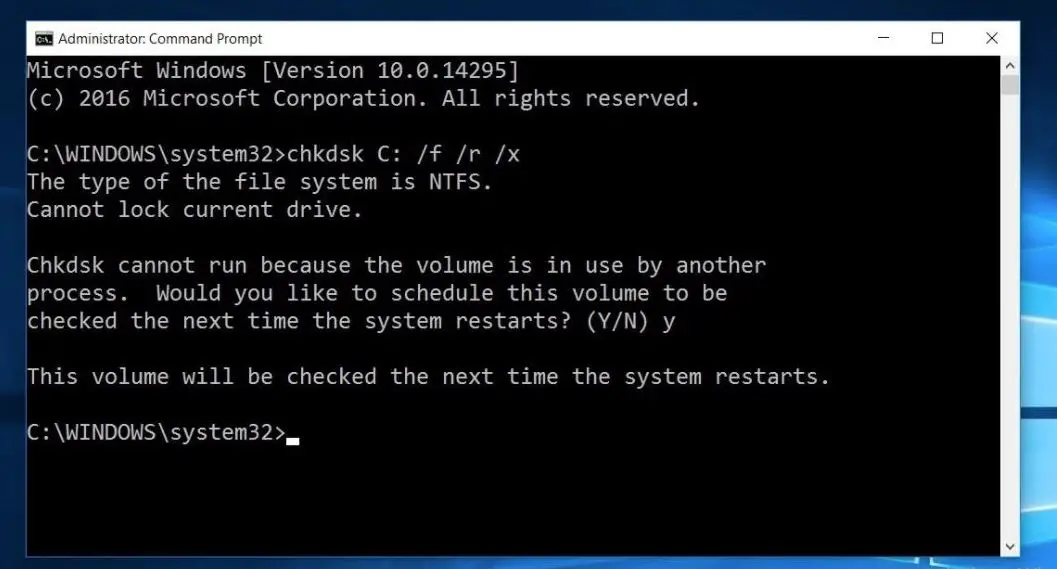
- Open Command Prompt as Administrator.
- Then type chkdsk c: /f /r and press Enter.
Command Explained: Here command chkdsk is for check disk Drive for errors. /F Fixes errors on the disk, And /r Locates bad sectors and recovers readable information.
You may be asked to restart your PC. Then press Y and press Enter. when the PC is restart this will scan your pc for Hard disk Errors and It will fix problems automatically. Now on Next Start check there is no more Blue Screen Error.
Verify System Settings and Configuration
Incorrect system settings or configurations can lead to memory pool errors. Verifying and ensuring proper configurations prevent disruptions to system stability.
Review recent changes to system settings.
Revert any changes that may have contributed to the error.
Pay attention to settings related to system resources and hardware.
Perform System Restore
System Restore allows the user to revert the system to a previous state, undoing changes that may be responsible for the Bad Pool Header error. This feature is particularly useful when the error occurs after recent system modifications. Check how to perform System Restore on Windows 10, 11.
Tips To Avoid Bad Pool Header
You might get this error again even if you managed to fix this issue once. but there are a few Precautions and Steps that you can take to avoid these errors again in the future.
- Always Avoid Using Cracked/Nulled Software.
- Keep Your Computer’s Registry Clean and organized with optimize Tools.
- Install good latest Antivirus / Anti malware and Avoid More than one Anti-virus/Anti-Malware program if not needed.
- Always Keep your Device Drivers Up to Date.
- Enable and Create Restore Points regularly.
Also Read
- Fix USB Device Not Recognized Error on Windows 10
- How To Fix if Windows 10 Stuck on Welcome Screen After login
- How to Fix APC_INDEX_MISMATCH BSOD in Windows 10/8.1 and 7
- 5 solutions to fix page fault in nonpaged area Windows 10 boot loop
- How To Fix Driver Overran Stack Buffer Windows 10 Blue Screen Error
