Google Chrome is the most popular web browser for internet lovers because of its faster, smoother user experience. It’s the most secure web browser Compatibility with your device. However, after some time it also appears to decrease in the browsing speed, Users search for How to Make Google Chrome Faster on Windows 10.
There are multiple reasons (Such as cache, junk, Browser history, extensions causing issues, etc) that make Google Chrome comparatively slower. If you are struggling with Google Chrome slow performance after the Windows 10 updates. Chrome feels a little slower than before, consuming High CPU or a lot of your system’s RAM, making your PC feel slower than it should. Here are simple steps to speed up the Chrome browser, and reduce the amount of RAM, and CPU the browser eats up.
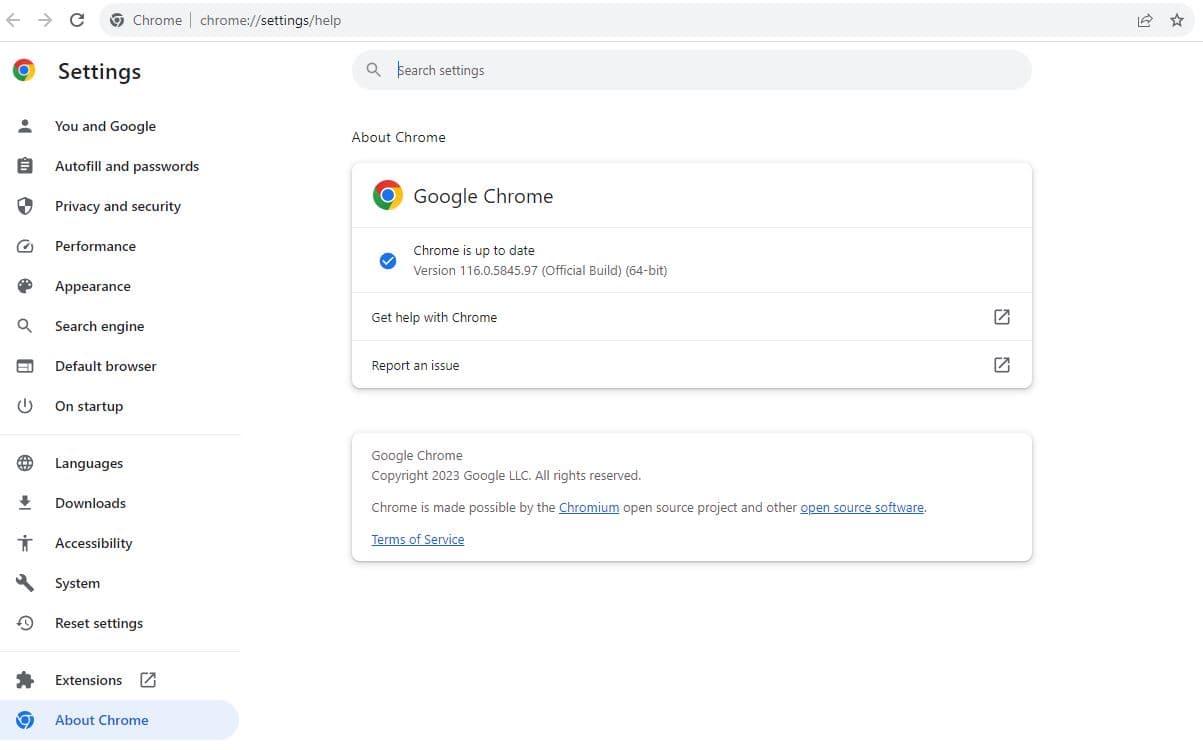
Update Google Chrome Browser
This is one of the main reasons for the slowness of the browser. Every update of Chrome comes with the latest security fixes and performance improvements. Therefore, it is advisable to always keep your browser updated.
However, Google Chrome automatically updates itself to the latest version. But sometimes due to a few technical reasons and poor connectivity, it would not be able to update itself.
- Open the Google Chrome browser
- type chrome://help into the address bar
- This will automatically check and install the latest update for the Chrome browser.
Clear cache & browsing data
Google Chrome stores cache and cookies for faster performance, But sometimes It is another vital issue that affects browser performance. Regularly clearing them you may find Google Chrome will automatically speed up
To clear cache & browsing data
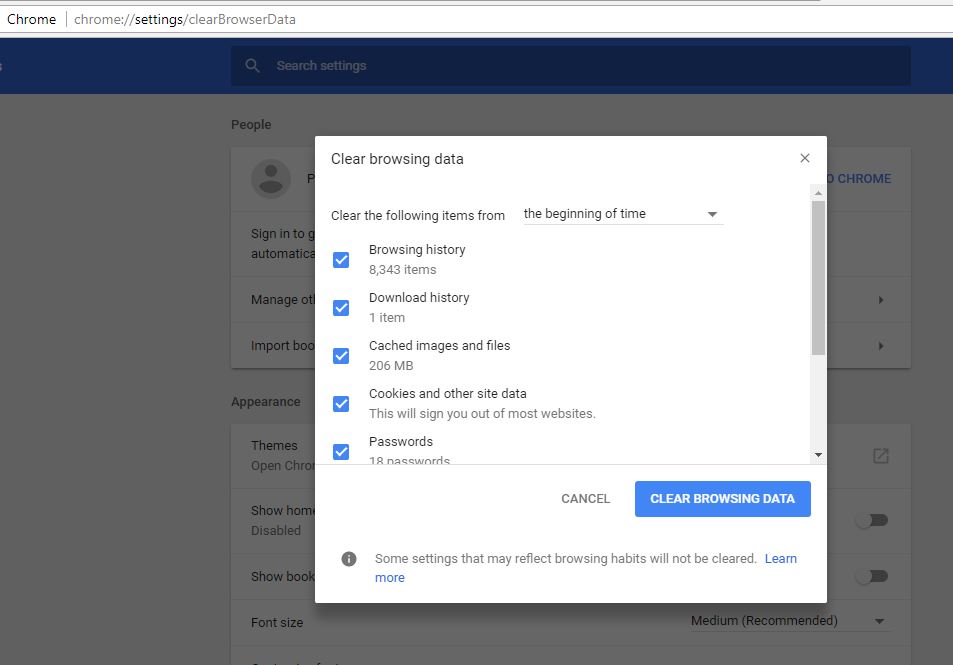
- Go to chrome://settings/clearBrowserData
- A popup window will open “Clear browsing data”.
- Select Cached images and files and Cookies and other site data.
- Make sure you have chosen “Time Range” >> “All time”
- Click Clear data
- Now restart Chrome and it will remove all the unnecessary data and start with the clean state.
Remove unusual extensions
Basically, Extension is a small program that you can add to your Google Chrome on Windows that lets you do something more. Which are helpful yet some may actually be less helpful than you think. Extensions mostly run in the background, and parse or filter web pages before they’re displayed on the screen, but will also load their own pack of data from the Internet. To get better browsing speeds and good response times, disable and/or delete extensions you don’t actually need.
To disable extensions follow bellow
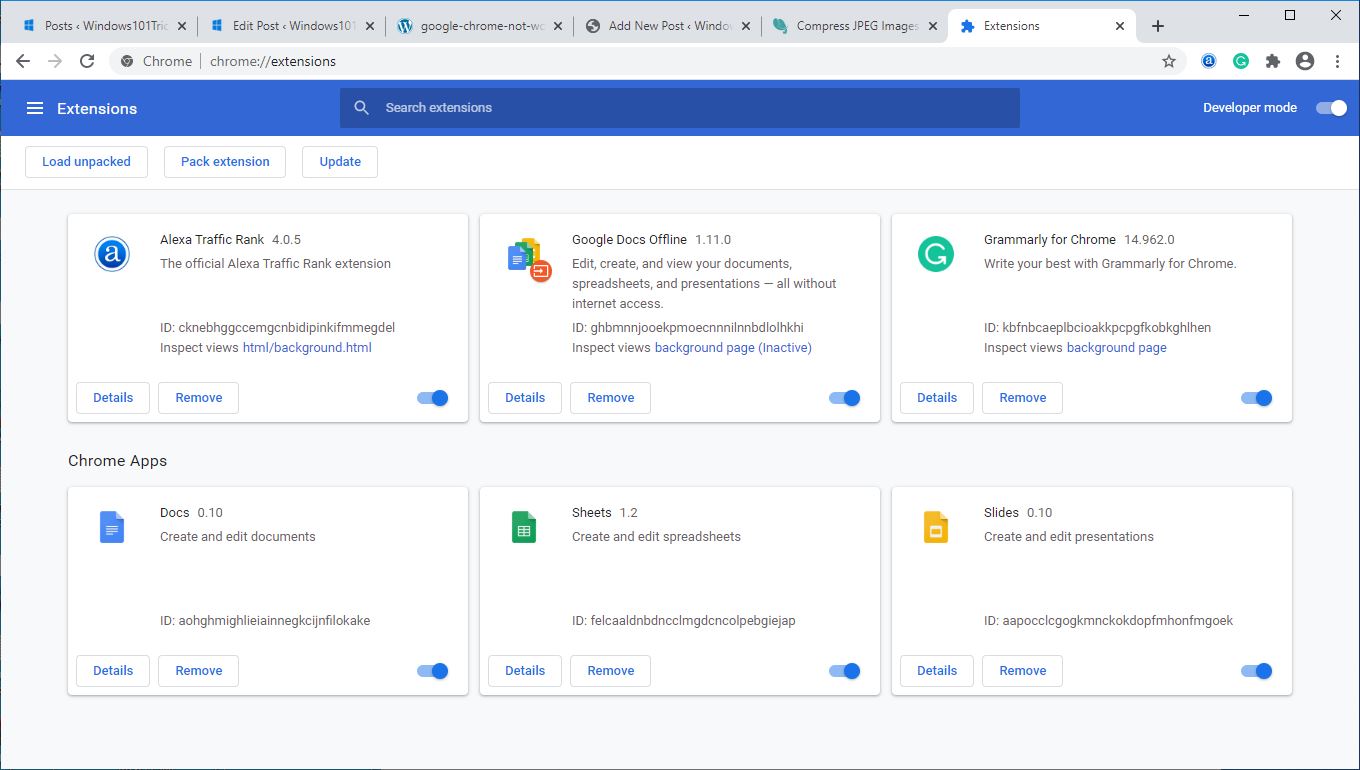
- Open Chrome browser and type chrome://extensions in your Chrome’s location bar.
- Alternatively, you can go to Chrome’s Options > More tools > Extensions.
- Here toggle off the extensions you want to disable or click the remove option to delete the extension.
- Disabling extensions should help a little but uninstalling them is your best bet (you can always put them back again later).
Disable Unnecessary Plugins
Also, Plugins are much like extensions. They provide extended functionalities to the web browser. Chrome comes with few built-in plugins provided by Google (like Chrome PDF Viewer, Native Client, etc.), and may carry plugins by other software installed on your computer. Plugins, like extensions, can slow down the browser and clog memory and network resources.
- To Disable Plugins on Chrome first Open Google Chrome and at the URL Address Bar type: chrome://plugins & press Enter.
- At the “Plug-ins” page, disable the “Adobe Flash Player” plugin And other plugins you no longer need.
Enable Prediction service
Google Chrome utilizes a wide variety of Web services and prediction services to improve your browsing experience. These range from suggesting an alternate website when the one you’re attempting to view is unreachable to predicting network actions ahead of time in order to speed up page load times.
To enable network predictions:
- Open Chrome browser, Go to “Settings”
- At the bottom side; choose “Advanced”
- In “Privacy and Security” section, turn ON the option for the following settings:
“Use a prediction service to help complete searches and URLs typed in the address bar” and “Use a prediction service to load pages more quickly”
Now relaunch your current Google Chrome browser to get a speedy web browser.
Enable the “Preload” Feature
It is the magical feature of Chrome that can drastically increase the speed of your browser. With this feature enabled in your browser, Chrome can preload some pages in the background of your interest. For example, if you type ‘Facebook’ in your browser then in the background it will already load the page http://www.Facebook.com/. Check out the official site to know more. https://support.google.com/chrome/answer/1385029?hl=en
To enable this feature to follow these steps
Step 1. Go to Chrome Setting> Advanced setting
Step 2. Check “Use a prediction service to load page more quickly.“
Run the Default Theme only
Google Chrome allows users to customize the interface including changing the themes. But on the negative side, most of the themes use so much freaking RAM which ultimately causes lower browsing speed and Chrome performance.
The default Chrome theme is already optimized to browse faster. So if you’re using any other theme then we suggest you remove it ASAP.
To use the default theme:
- Go to chrome://settings
- In the “Appearance” section, choose “reset to default”
- Initially, you feel some wired, but default the theme is a good way for Chrome optimization.
Tweak Some Advanced settings
Plugging up: You can enhance your browsing performance by ensuring that Chrome Flash content loads only when if you want to do it. To do this go to the Chrome advanced settings option and click on content settings. Now select the privacy section and find another option “let me choose when to run plugin content” under the plugins option. Now it will only play the time when you are going to click on it.
Flagging up: it is so simple but very handy feature that makes the Google Chrome browser shut down all the tab quickly as you make the browser run faster as did before. Practically this technique helps to run Chrome on JavaScript Handler of the graphical user interface (GUI) on your computer. Thereafter it speeds up Chrome and not take a long time to close the tabs.
To access this technique, type chrome://flags on the address bar. Find the Omni box. Search for another option ” Fast tab/window close” and click on the enable button below the Omni box to activate these features properly.
Check for unwanted software
If you’re on Windows, use the Chrome Cleanup Tool to find and remove unwanted software. The tool will perform a complete scan and remove any software that it finds may cause problems for Chrome. Once you have removed the infections and malicious programs via the Chrome Cleanup Tool, check the browser performance.
Return to the Default Browser Settings
If all the above method fails to speed up Chrome Browser then it’s time to return to the Default Browser settings. which reset Chrome browser settings to default setup and fix if any customization tweak caused to chrome browser slow down.
- Launch Chrome, then go to the More menu in the top right which looks like three horizontal dots.
- After clicking it, choose Settings, then Advanced.
- There, you’ll see a Reset section with a button of the same name.
- Click it to confirm you want to return to the default settings.
Did you notice changes on Chrome browser performance after applying these tweaks? Let us know on the comments below, Also read:
- Google Chrome not working /responding in Windows 10? Try these 7 Solutions
- Microsoft Edge not Responding, and Slow Performance after the Windows 10 update
- Chromecast not working after Windows 10 update ( solved )
- Windows 10 Freezes frequently while playing Games
- How To Fix Google Chrome High CPU Usage Windows 10


