Microsoft regularly releases Windows 10 cumulative updates to fix the security holes created by third-party applications that contain security improvements and bug fixes reported by users. Every compatible device connected to the Microsoft server gets installed these updates automatically. But sometimes after an improper shutdown, software crash, power failure or something went wrong with your Registry, Windows Update can fail to work properly. As users report Windows 10 Stuck checking Updates for hours, Windows Update download and installation stuck at 0% to 99% or Windows 10 Cumulative Update failed to install.
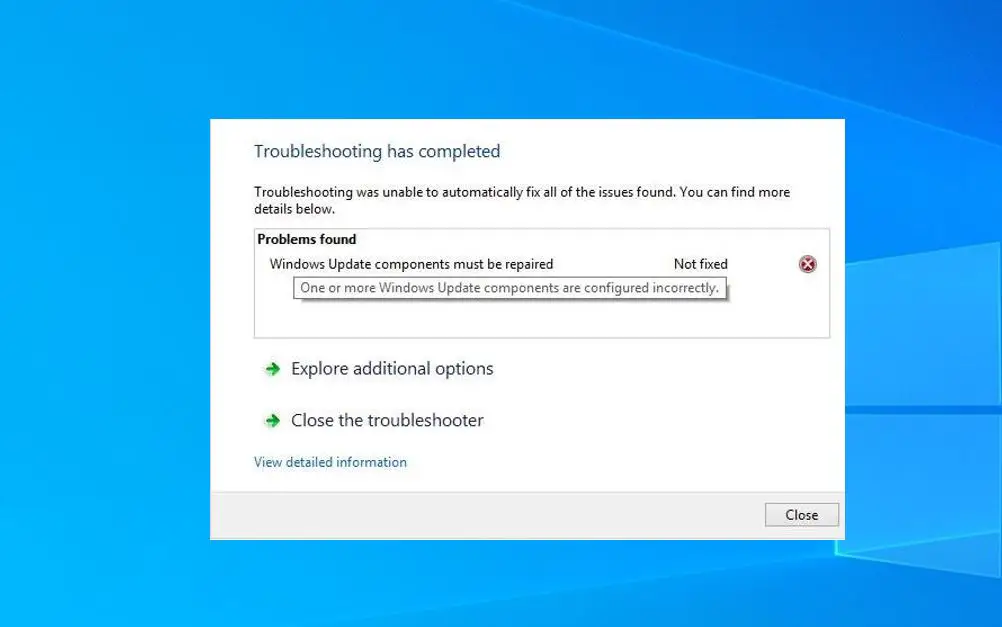
In such a case, you’re suggested to Run the Windows Update troubleshooter diagnostic that automatically finds and fixes issues that prevent Windows Update installation. However, in some cases, the Update troubleshooter may identify issues but is unable to fix them. One such common issue that troubleshooter fails to fix is:
Windows Update Components must be repaired
one or more Windows update components are configured incorrectly
Windows Update Components Must Be Repaired
So if you are in a situation where a Windows update troubleshooter is unable to resolve your Windows Update-related issue, Here are some solutions you may apply manually (repair or reset Windows Update components) to fix the problem on your end.
First of all, apply some basic troubleshooting steps which may fix the windows update problem.
- Make sure you have a stable internet connection to download Windows update files from the Microsoft server.
- Temporarily disable security software (antivirus) and disconnect from VPN if configured.
- Check and correct the Date and time zone from settings -> Time & Language -> Region and Language (Here set the country or region United States and language as English (United States)) also correct the Date and time.
- Also Check your system drive (basically C: drive) have free space to download and install these updates on your system. In addition, run Disk Cleanup or configure Storage Sense to automatically clean up junk, cache, and temp files on your system and free up disk space.
- Run DISM command dism.exe /Online /Cleanup-image /Restorehealth and System file checker utility sfc /scannow to repair the system image, and restore corrupted, missing system file, which may also fix the corrupted update components and fix the Windows update installation problem.
- Perform Windows 10 clean boot to check and make sure any third-party software conflict not causing the issue, where Windows fails to install and apply updates.
Reset Windows Update Components
Let’s reset or repair Windows Update components that probably help with fix most of the Windows update installation problems.
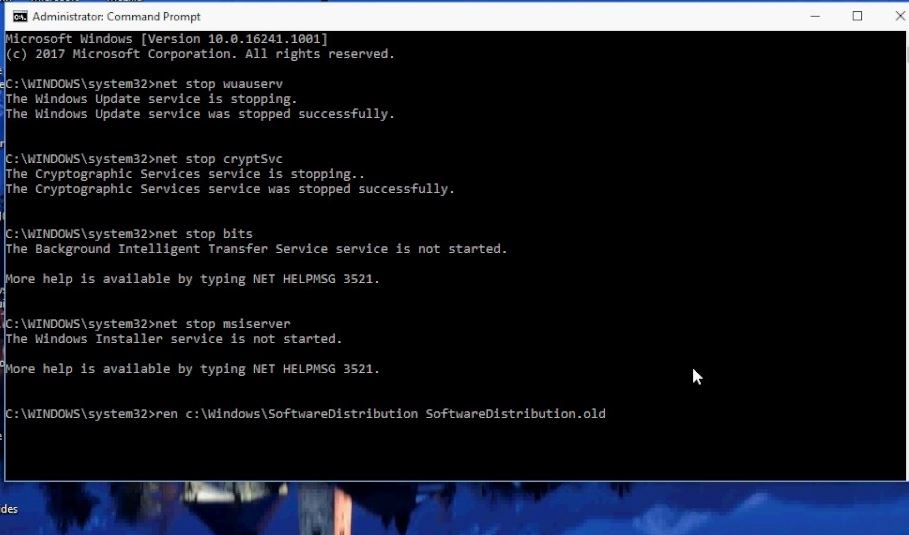
Open the command prompt as administrator and perform the command below to stop the services that Windows Update requires to download and install updates.
- net stop wuauserv
- net stop cryptsvc
- net stop bits
- net stop msiserver
Now perform the command below to rename the SoftwareDistribution and catroot2 folders, which are used by Windows Update to store data and temporary files. Your system will detect that these folders are missing, and then it’ll create new ones. The purpose of this is to make the system use the new SoftwareDistribution and catroot2 folders so that Windows Update can avoid issues from the old ones.
- Ren %systemroot%\SoftwareDistribution SoftwareDistribution.old
- Ren %systemroot%\system32\catroot2 catroot2.old
Now We are going to Reset the BITS service and the Windows Update service to the default security descriptor. To do this, at a command prompt, type and execute the following commands.
exe sdset bits D:(A;;CCLCSWRPWPDTLOCRRC;;;SY (A;;CCDCLCSWRPWPDTLOCRSDRCWDWO;;;BA) (A;;CCLCSWLOCRRC;;;AU)(A;;CCLCSWRPWPDTLOCRRC;;;PU)
exe sdset wuauserv D:(A;;CCLCSWRPWPDTLOCRRC;;;SY)(A;;CCDCLCSWRPWPDTLOCRSDRCWDWO;;;BA) (A;;CCLCSWLOCRRC;;;AU)(A;;CCLCSWRPWPDTLOCRRC;;;PU)
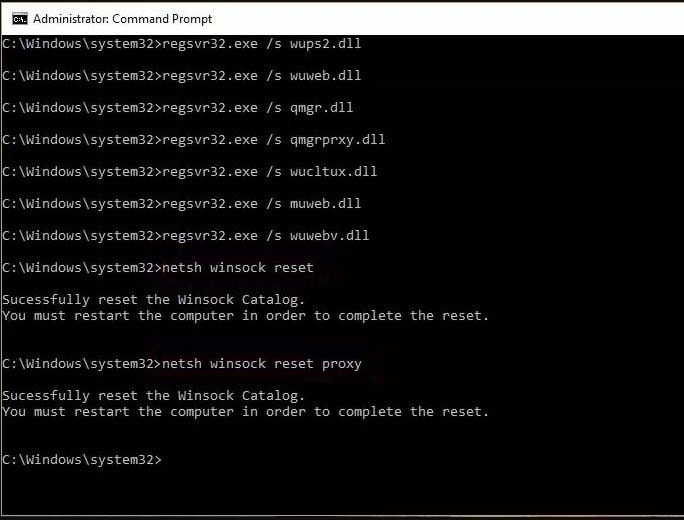
Now, Re-register the BITS files and the Windows Update-related all files. To do this perform the following commands one by one and press enter key to execute.
cd /d %windir%\system32
regsvr32.exe /s atl.dll
regsvr32.exe /s urlmon.dll
regsvr32.exe /s mshtml.dll
regsvr32.exe /s shdocvw.dll
regsvr32.exe /s browseui.dll
regsvr32.exe /s jscript.dll
regsvr32.exe /s vbscript.dll
regsvr32.exe /s scrrun.dll
regsvr32.exe /s msxml3.dll
regsvr32.exe /s msxml6.dll
regsvr32.exe /s actxprxy.dll
regsvr32.exe /s softpub.dll
regsvr32.exe /s wintrust.dll
regsvr32.exe /s dssenh.dll
regsvr32.exe /s rsaenh.dll
regsvr32.exe /s cryptdlg.dll
regsvr32.exe /s oleaut32.dll
regsvr32.exe /s ole32.dll
regsvr32.exe /s shell32.dll
regsvr32.exe /s wuapi.dll
regsvr32.exe /s wuaueng.dll
regsvr32.exe /s wups.dll
regsvr32.exe /s wups2.dll
regsvr32.exe /s qmgr.dll
regsvr32.exe /s wudriver.dll
Now, reset your network configuration by performing the command below.
netsh winsock reset
netsh winsock reset proxy
ipconfig /flushdns
And perform the command below to restart the windows update-related services which you stopped previously.
- net start bits
- net start wuauserv
- net start appidsvc
- net start cryptsvc
That’s All, Now Restart Your Computer To take effect the changes and get a fresh start to your Windows computer. Then after check for Windows updates from Settings -> Update & Security -> Windows updates -> check updates. I hope this time you get succeed, there is no more error.
Install Windows Update manually
If all the above solutions fail to fix the problem, still windows update stuck downloading or fail to install then let’s install Windows updates manually. Visit the Windows 10 update history webpage where you can notice the logs of all the previous Windows updates that have been released.
For the most recently released update, note down the KB number.
Now use the Windows Update Catalog Website to search for the update specified by the KB number you noted down. Download the update depending on if your machine is 32-bit = x86 or 64-bit=x64.
(As of today – KB5012599 (OS Build 19044.1645) is the latest patch for Windows 10 and, KB5012592 (OS Build 22000.613) is the latest patch for Windows 11.
Open the downloaded file in order to install the update.
That’s all after installing the updates simply restart the computer to apply the changes.
Perform a System File Checker scan
Sometimes Corrupted Windows system files also prevent Windows updates apply and result in “Windows Update components must be repaired”. In such situations run the system file checker utility also known as SFC scan, which allows you to scan and automatically fix a number of issues on your system. Here is how to Perform a System File Checker scan on Windows 10.
- Press Windows key + S, type cmd, From search results right-click on the command prompt and select run as administrator,
- Click yes if UAC prompts for permission to open the Command Prompt with administrative permissions.
- Now type the command sfc /scannow and press enter key
- Let the SFC command to finish scanning your computer for corrupted system files.
- If it finds any errors, SFC utility is able to fix them automatically, which may also fix related errors.
Check the Date and timezone
In specific cases, having the wrong date and time zone settings may cause problems with Windows Update. We recommend you double-check and correct any issues manually.
Also If you are getting Windows to update stuck during the upgrade process simply uses the official media creation tool to upgrade to Windows 10 version 22H2 without any error or problem.
Did these solutions help to fix Windows update installation problems including “Windows update components must be repaired “if one or more Windows update components are configured incorrectly? Let’s share your feedback on the comments below,
Also, Read
- Fix WUAUSERV (Windows update) High CPU usage in Windows 10
- Solved: Windows 10 Slow Shutdown after Update
- Laptop Stuck Getting Windows ready Don’t turn off your computer. Try these solutions
- Windows 10 Blue Screen of Death (BSOD) Error – An Ultimate Guide
- 5 solutions to fix NTFS_FILE_SYSTEM error in Windows 10/8/7


