WiFi adapter not showing up after Windows 11 upgrade, and this prevents Internet access on your Laptop? Windows 11 WiFi adapter missing or not showing up, This type of issue usually occurs because of an Outdated WiFi driver, problem with the WiFi adapter or incorrect network configuration. This article explores the possible reasons behind this problem and solutions to Get back the Missing WiFi adapter and restore internet access on Windows 11.
WiFi Adapter Not Showing Up in Windows 11
If the problem started after a recent Windows 11 update or upgrade, Outdated or incompatible drivers are a common cause. Windows 11 may not recognize your Wi-Fi adapter if the driver isn’t functioning correctly. Conflicting software or recent system updates can interfere with your adapter’s functionality, leading to it not showing up. A malfunctioning Wi-Fi card or loose hardware connections can result in the adapter not being detected. Again Power management settings can sometimes turn off or disable hardware components, including the Wi-Fi adapter, to conserve energy result wifi frequent disconnects.
And Update Wi-Fi Adapter Drivers, running network adapter troubleshooter most probably fix the problem and restore internet access on Windows 11. In addition, you need to check the power configuration settings and reset the WIFI network adapter in settings to fix the problem.
Update the wireless drivers
Outdated or corrupt drivers can cause the wireless adapter missing or disappear in Windows because they may not be compatible with the latest Windows updates. Older drivers might contain bugs or glitches that can cause your Wi-Fi adapter to malfunction. Updating your Wi-Fi drivers ensures that your adapter is compatible with the latest Windows updates, is free from known bugs, and has the latest security patches.
Updating drivers can resolve compatibility issues and improve device recognition.
- Right-click the Start button and select “Device Manager.”
- Locate “Network adapters” and expand it.
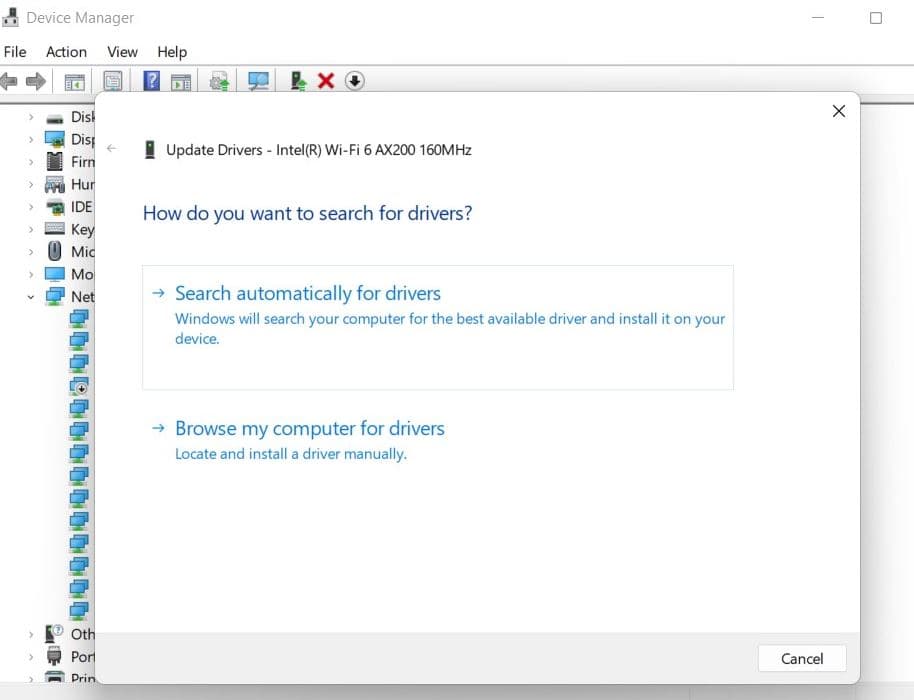
- Right-click your Wi-Fi adapter and choose “Update driver.”
- Click Search automatically for drivers, Follow the on-screen prompts to update the driver automatically.
- Once done Restart your PC to apply the changes.
Note: You can use a wired connection on a laptop to enable internet access and get driver updates.
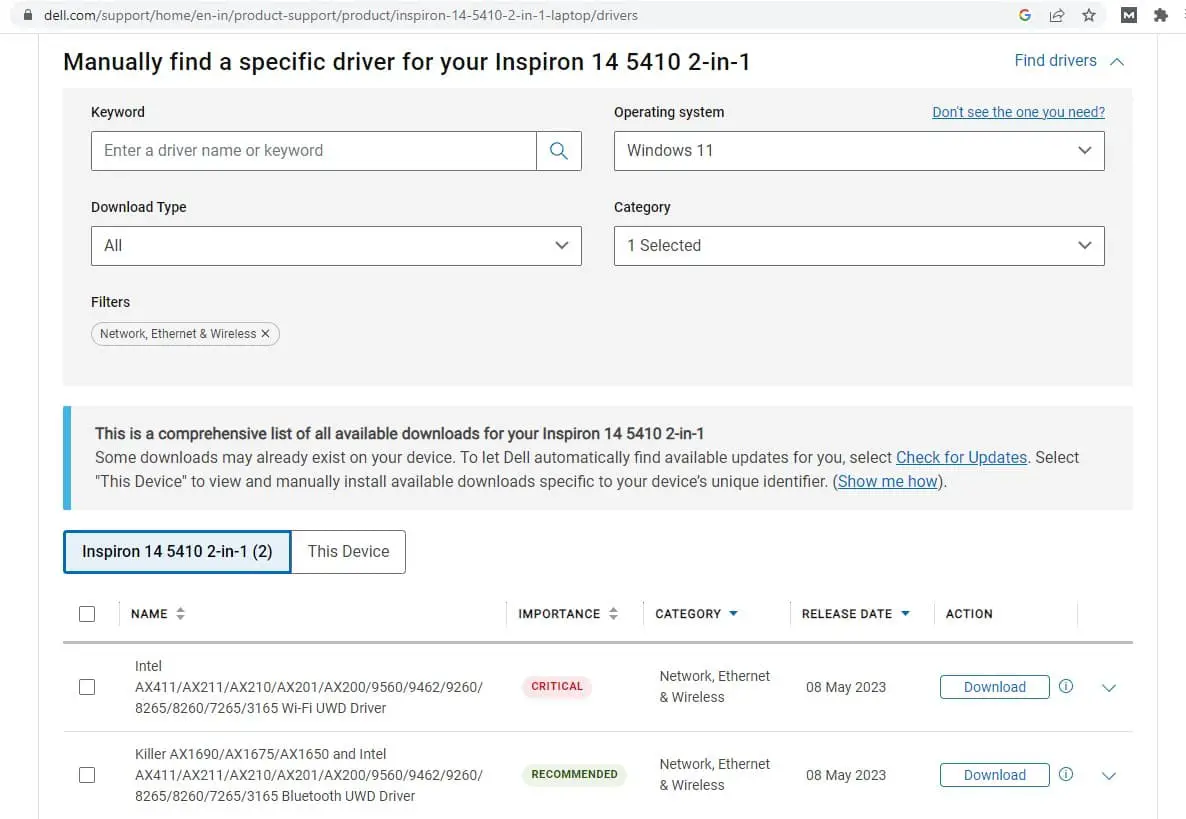
You can also visit your network adapter manufacturer’s website, to download and install the latest wifi driver for Windows 11.
Alternatively, you can run third-party driver updater software to automatically check and install the latest wifi driver and other drivers on your Laptop.
Show the hidden devices in Device Manager
Still wifi adapter not showing up after update the driver, it may be Your wireless network adapter is hidden in Device Manager.
- Press windows key + x and select Device Manager,
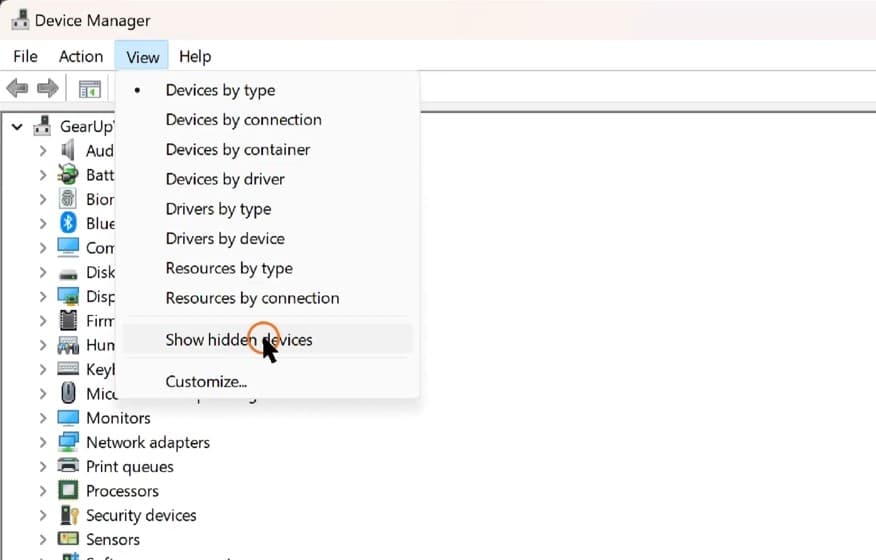
- Under the View menu, select the Show Hidden device option and check if the Network Adapter option is visible now.
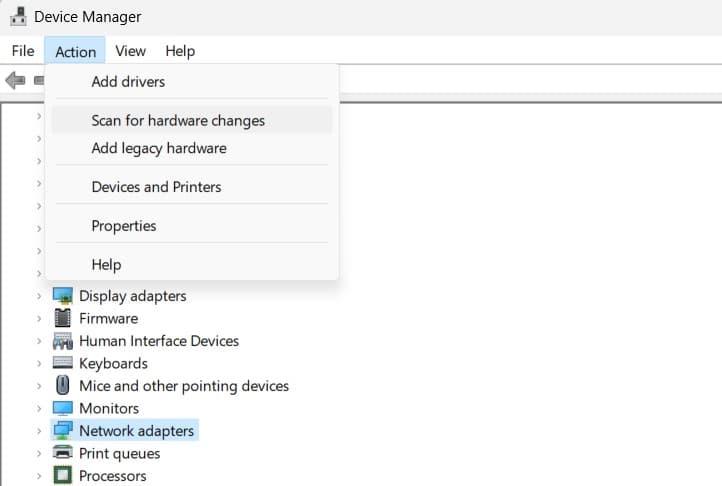
- In addition, Go to the Action menu on the top and click on Scan for hardware
- And finally, expand the Network Adapters dropdown and see if your wireless adapter is listed there.
Run the network troubleshooter
Running the built-in Network Troubleshooter also helps diagnose and potentially fix issues related to the WiFi adapter not showing up or missing on Windows 11.
Running the Network Troubleshooter can often resolve common network adapter issues, including those related to missing or not showing up Wi-Fi adapters.
- Press the Windows key + I to open the settings app
- Go to system then Troubleshoot and click on Other troubleshooters,
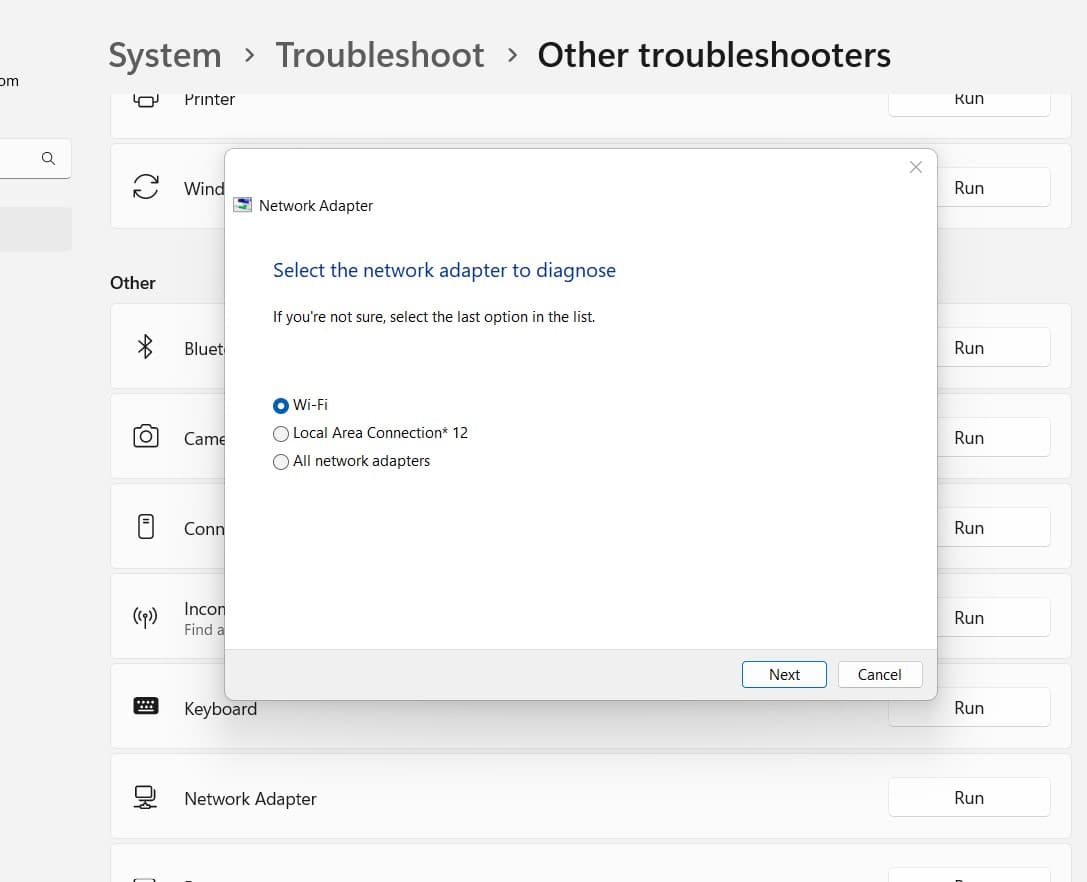
- Click Run next to Network adapter, choose wifi option and follow on-screen instructions.
The troubleshooter attempt to find the issue prevents the Wi-Fi adapter not working or not showing up on Windows 11 and try to fix them automatically. Once done, reboot your PC and check if the Wi-Fi adapter is back and the internet working on your PC.
Perform a Network Reset from Settings
Again Performing a Network Reset in Windows can help resolve various network-related issues, including problems with missing or not showing up Wi-Fi adapters on Windows 11. This option removes all network adapters and reset network settings to their default configurations.
Note: After performing this option you will need to set up your Wi-Fi connections again, and any custom network configurations will be lost.
- Press the Windows key + X and select settings
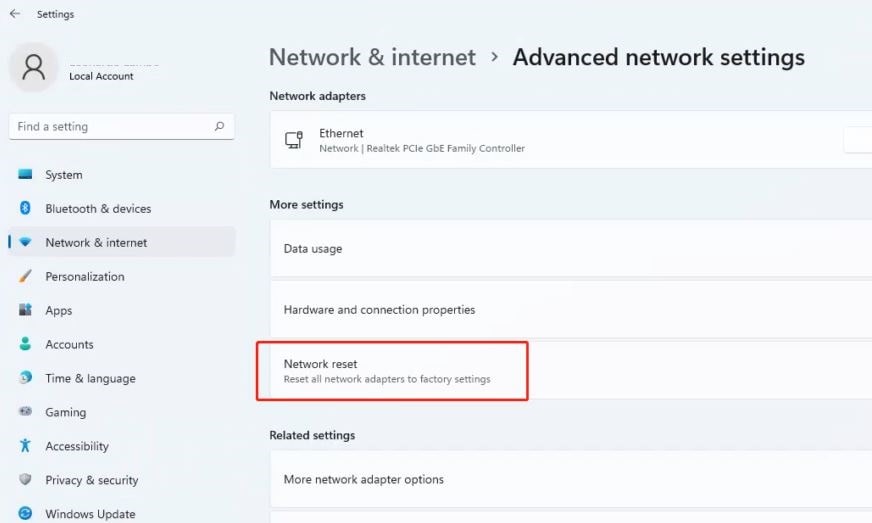
- Go to Network & Internet then click on Advanced Network Settings,
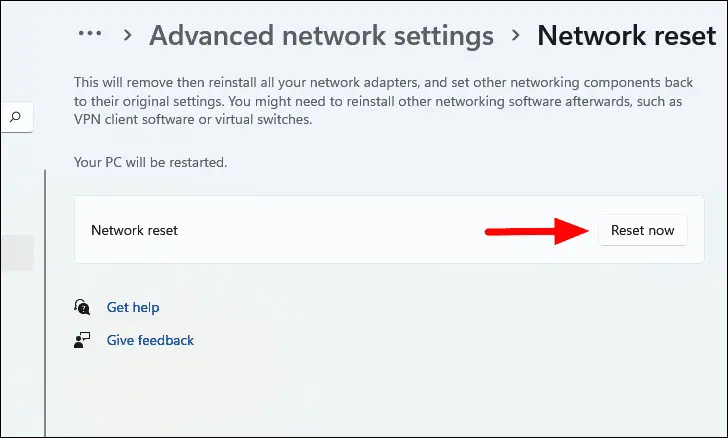
- Click Network Reset next to more settings then click on Reset now.
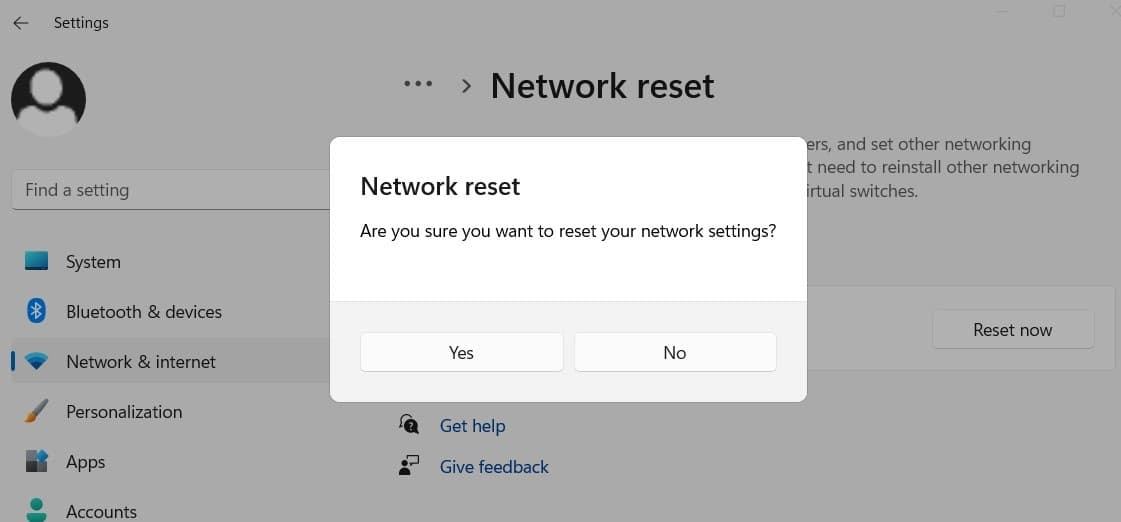
- Click Yes when it prompts for confirm and start the network reset process.
After the network reset is complete, your computer will automatically restart. Now Click on the Wi-Fi icon in the system tray, select your network, and enter the password to reconnect.
Adjust Power Management Settings
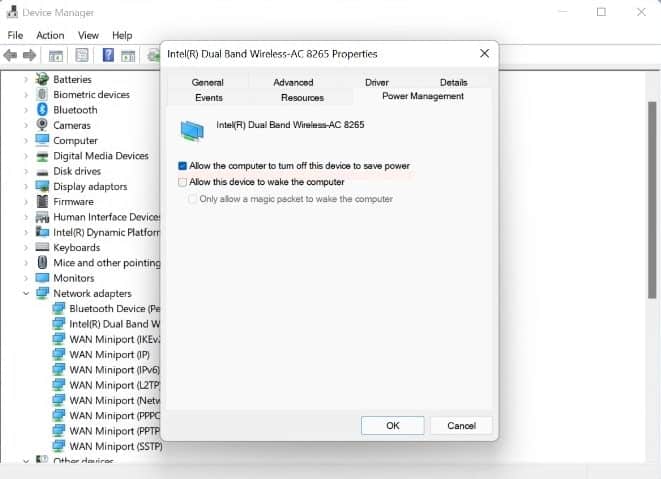
Power management settings can sometimes cause a laptop to turn off the wireless adapter to conserve power. If you suspect that this is the issue, you can adjust the power management settings for your wireless adapter to prevent it from being disabled.
- Press Windows key + X and select Device Manager
- Expand the “Network adapters” section to see a list of your network adapters, including the wireless adapter.
- Right-click on your wireless adapter and select “Properties” from the context menu.
- Go to the “Power Management” tab and Uncheck the option next to “Allow the computer to turn off this device to save power.”
- Click “OK” to apply the changes and restart your laptop for the new power management settings to take effect.
Reset TCP/IP configuration
Sometimes, Resetting the TCP/IP (Transmission Control Protocol/Internet Protocol) configuration can be a helpful troubleshooting step for resolving network-related issues, including problems with a missing or not showing up Wi-Fi adapter.
First, open Command Prompt as administrator and run the following commands one by one.
netsh winsock reset
netsh int ip reset
ipconfig /release
ipconfig /renew
ipconfig /flushdns
Once done close the command prompt and restart your Laptop to take effect the changes.
Check for Windows Updates
Microsoft partners with many hardware manufacturers. Therefore, there’s a legit chance you’ll get your wireless adapter update through Windows Update.
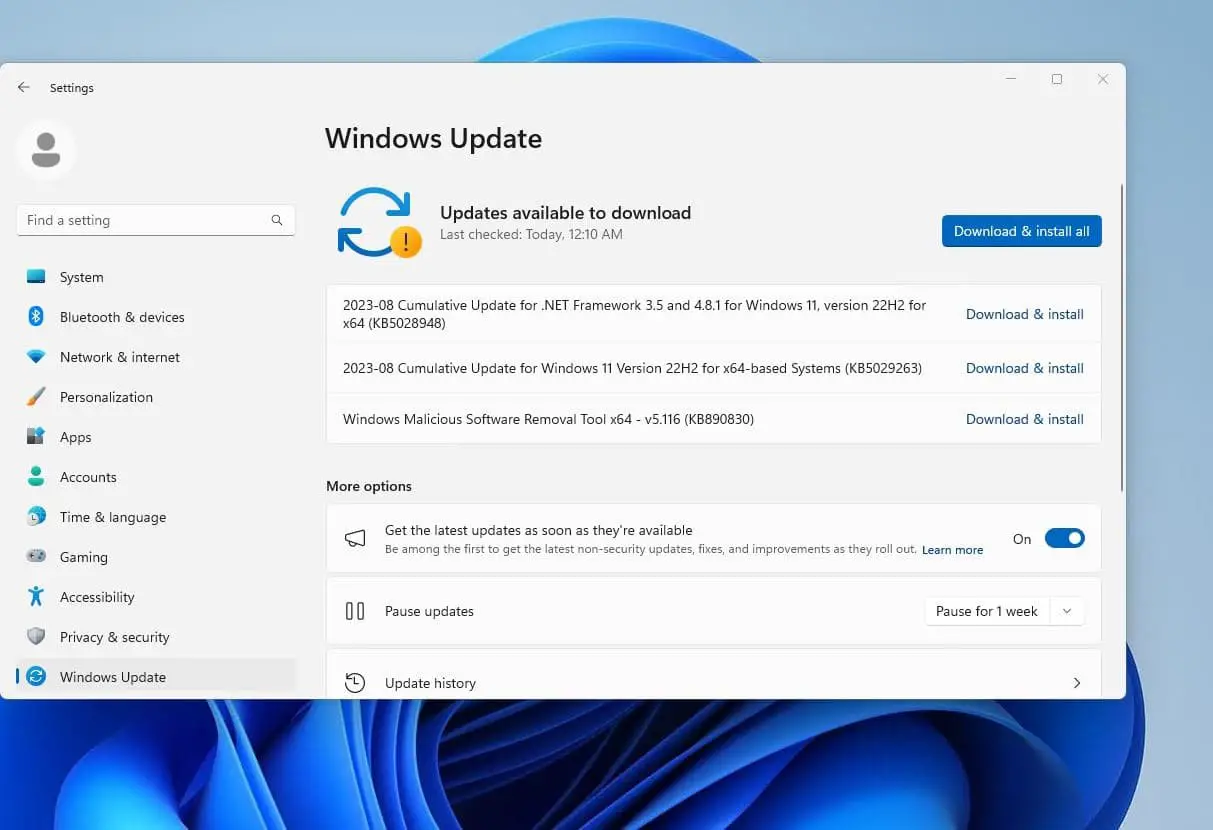
- Open your Settings app using the Windows key + I
- Click on Windows Update at the bottom of the left pane.
- Click the Check for updates button, if new updates are available allow them to download and install.
- Once done reboot your Laptop to apply the changes.
Few users report Delete wireless profile using the command netsh wlan delete profile name=”WirelessProfileName” then Reconnect and reconfigure the network help them fix the wireless adapter problem on Windows 11.
Note: Replace WirelessProfileName with the actual name of your wireless connection.
Sometimes, antivirus programs can interfere with your wireless connection and cause a problem with wireless adapter or access point error. Temporarily disable or remove all third-party antivirus tools on your Laptop and check if the internet access is restored. I have personally noticed after installing the VPN client have experienced no internet access, the wifi adapter not showing up and uninstalling the VPN app help me fix the problem on my Dell laptop.
Also read:

