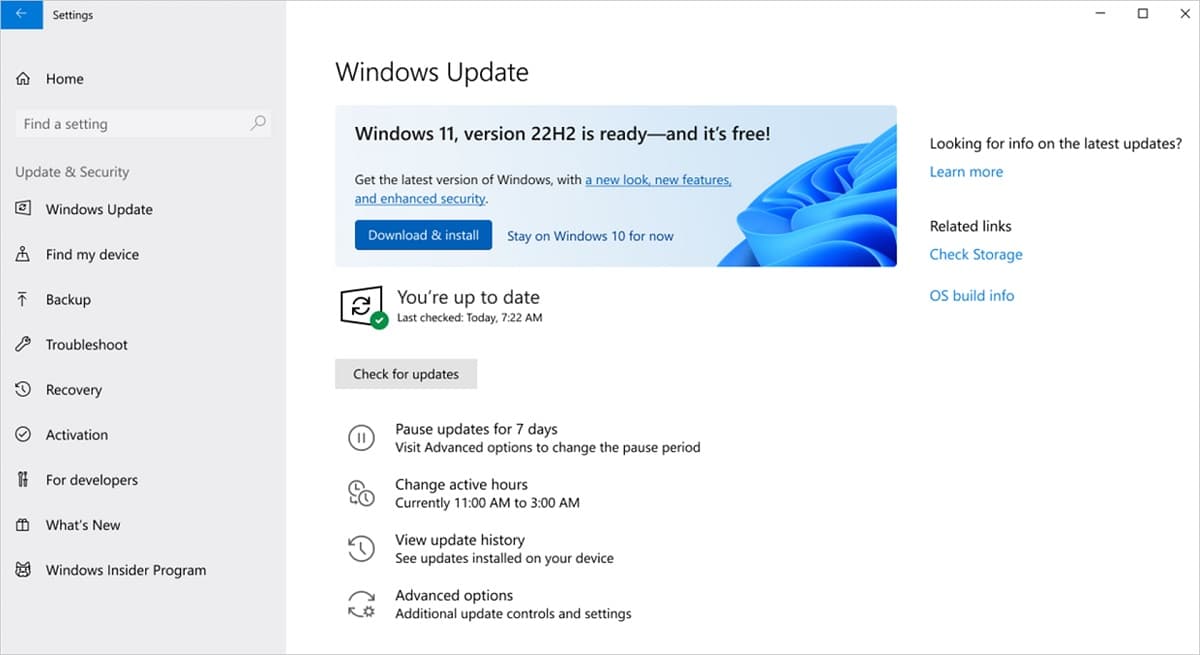
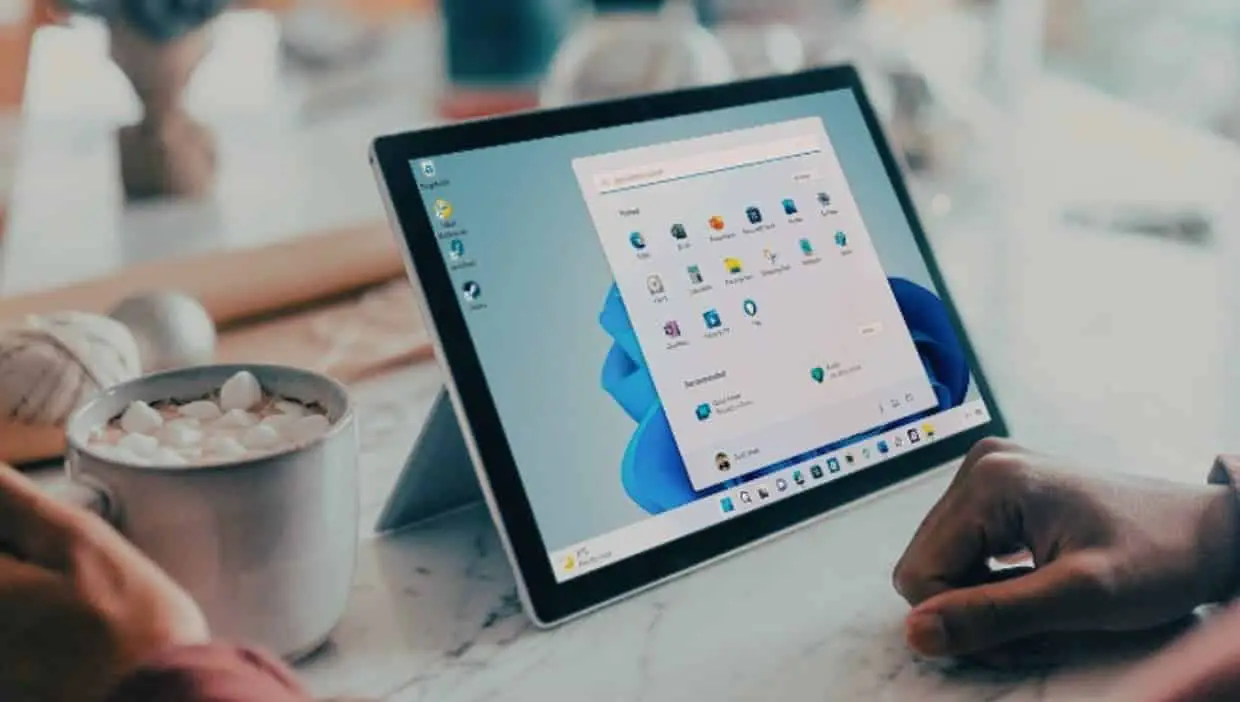
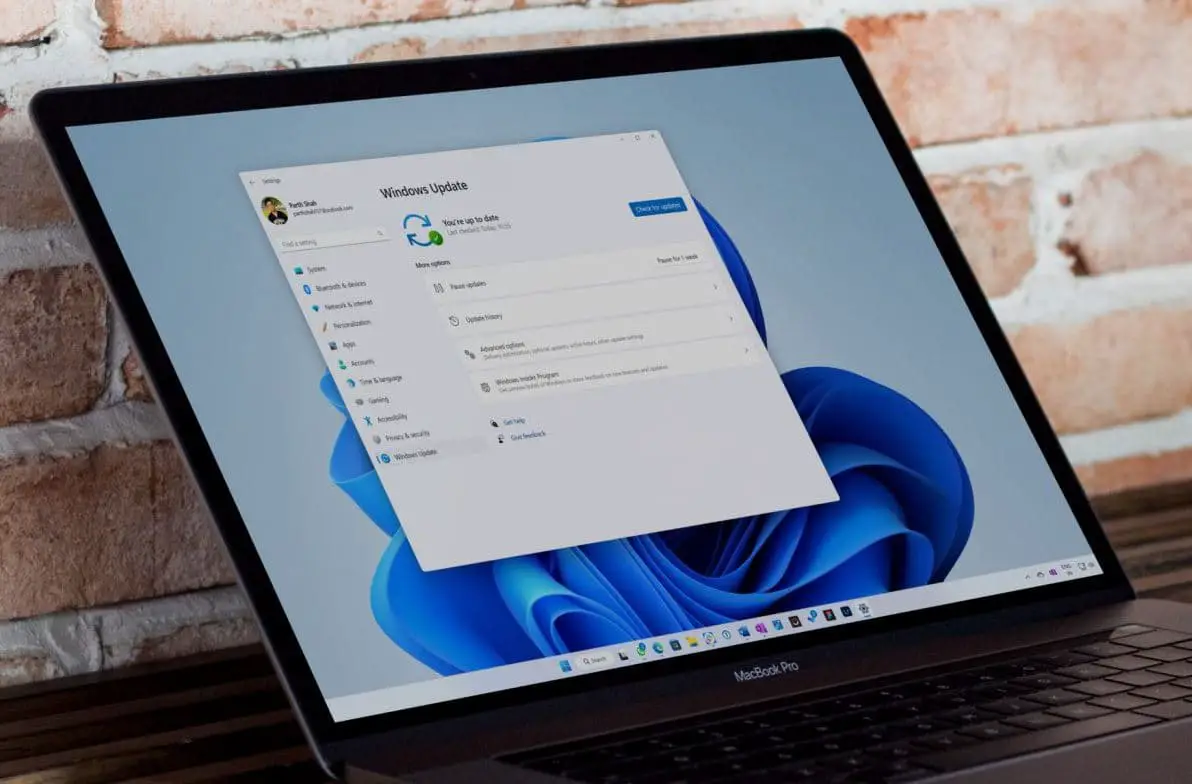
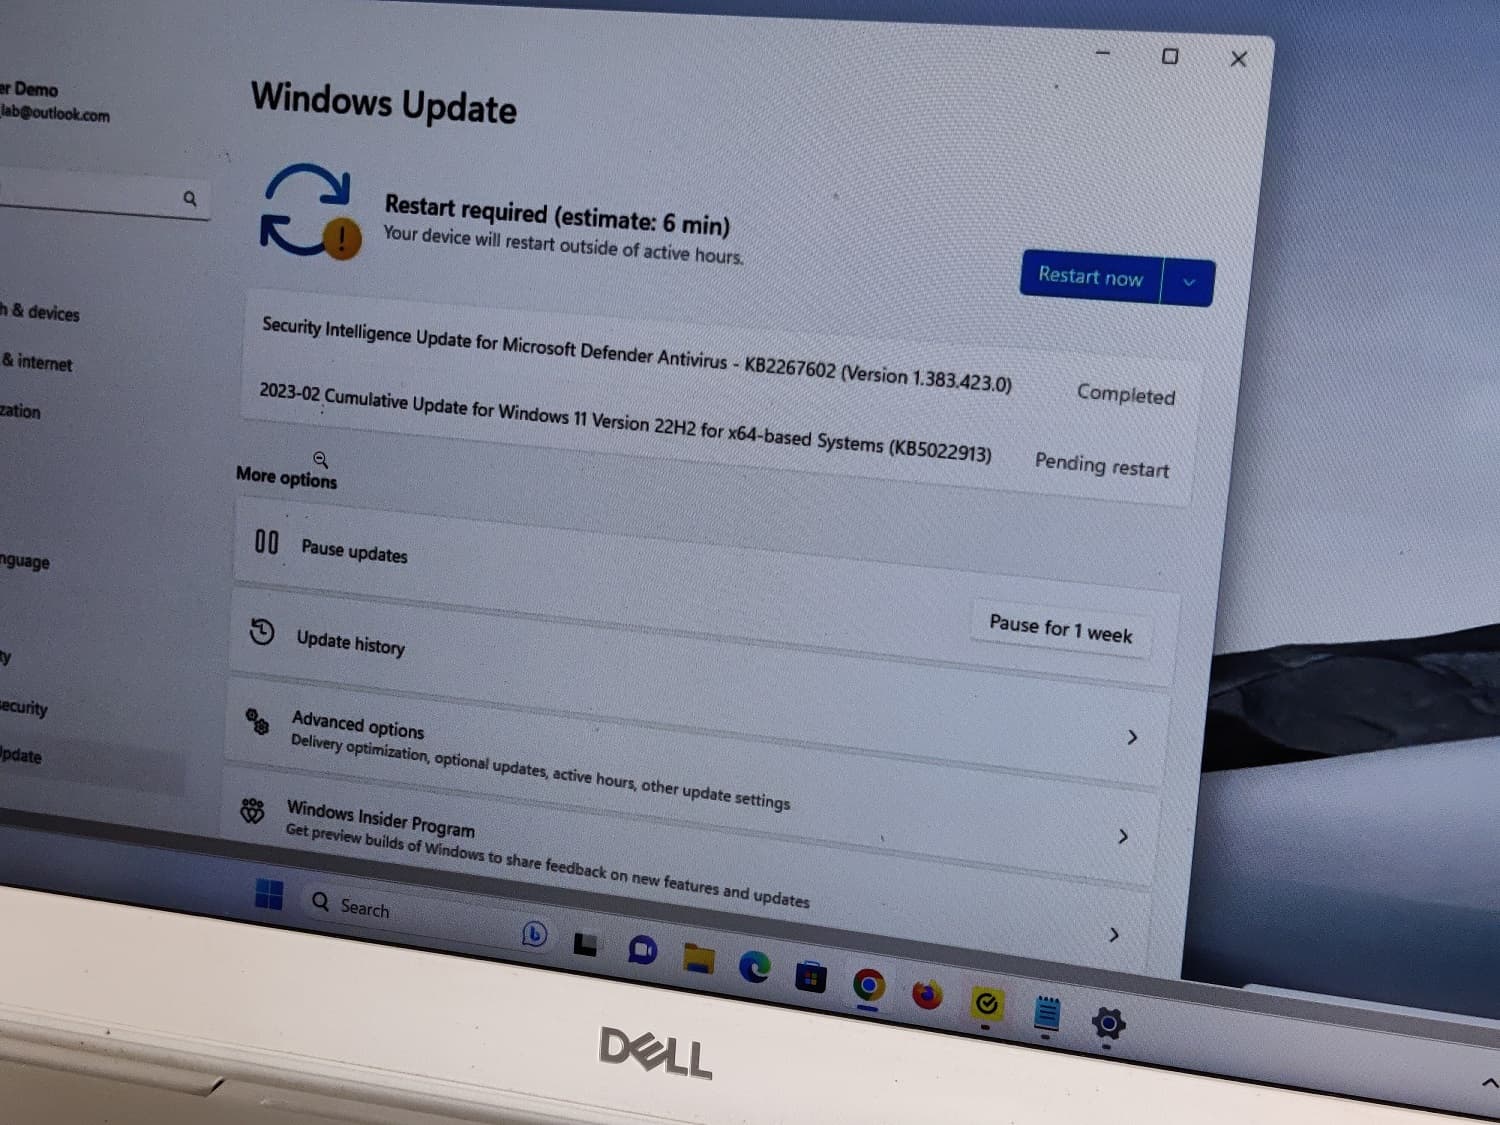
Microsoft has started the Windows 11 version 23H2 rollout as a free upgrade for compatible devices only. This means if your devices meet Windows 11 system requirements and running Windows 10 version 2004 and later you will receive a Windows 11 23H2 ready notification. You can install Windows 11 23H2 update via Windows update, using the installation assistant or by downloading Windows 11 2022 Update ISO from Microsoft website. This huge update brings many new features and improvements to existing ones, so the download or installation takes longer than normal Windows updates. Overall the Windows 11 installation is less painful But few users report Windows 11 installation has failed. Some others display an error message “there were some problems installing updates, but we’ll try again later.”
Contents
- 1 Why Windows 11 Installation Fail?
- 2 Windows 11 version 23H2 Failed to install
- 2.1 Windows 11 minimum system requirements
- 2.2 Use the PC Health Check App to find out the problem
- 2.3 Enable TPM 2.0 in BIOS for Windows 11
- 2.4 Enable the Secure Boot option
- 2.5 Check internet connection
- 2.6 Free Up Storage Space
- 2.7 Run Windows Update troubleshooter
- 2.8 Reset Windows update components
- 2.9 Run DISM and SFC utility
- 2.10 Update device driver
- 2.11 Change DNS address
- 2.12 Bypass TPM 2.0 and Secure Boot Checks
Why Windows 11 Installation Fail?
Multiple possible reasons could prevent Windows 11 free upgrade. PC doesn’t meet the hardware requirements, Driver conflict or drivers are outdated, security software interferes, system file corruption and problems with Internet connectivity are some common.
Run Windows Update Troubleshooter, clear update cache files or reset Windows update components, disable security software and disconnect VPN or external devices are some of the common solutions to fix Windows 11 upgrade failed to install or stuck download.
Windows 11 version 23H2 Failed to install
If you are struggling to install Windows 11 version 23H2, the upgrade process stuck download at any percentage 0% to 99% or fails with a different error, apply the solutions listed below.
Before going forward, The first thing that you should try is to restart your computer and try again. Because sometimes, a minor glitch creates issues while installing a Windows update.
In addition check and make sure your device meets the minimum system requirements for Windows 11 free upgrade.
Windows 11 minimum system requirements
The Minimum System Requirements for Windows 11 Are as Follows:
- Processor: 1 gigahertz (GHz) or faster with 2 or more cores on a compatible 64-bit processor or System on a Chip (SoC)
- RAM: 4 Gigabytes (GB)
- Storage: 64 GB or larger storage device
- System firmware: UEFI, Secure Boot capable
- TPM: Trusted Platform Module (TPM) version 2.0
- Graphics card: Compatible with DirectX 12 or later with WDDM 2.0 driver
- Display: High definition (720p) display that is greater than 9” diagonally, 8 bits per color channel
- Internet connection and Microsoft accounts: Windows 11 Home edition requires internet connectivity and a Microsoft account to complete device setup on first use.
Use the PC Health Check App to find out the problem
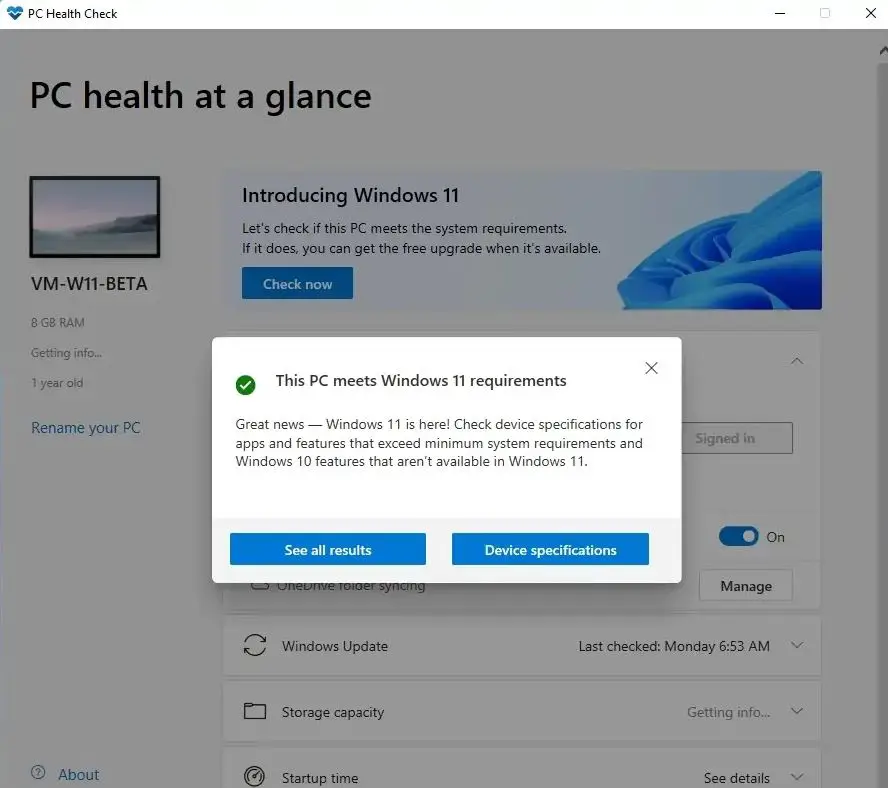
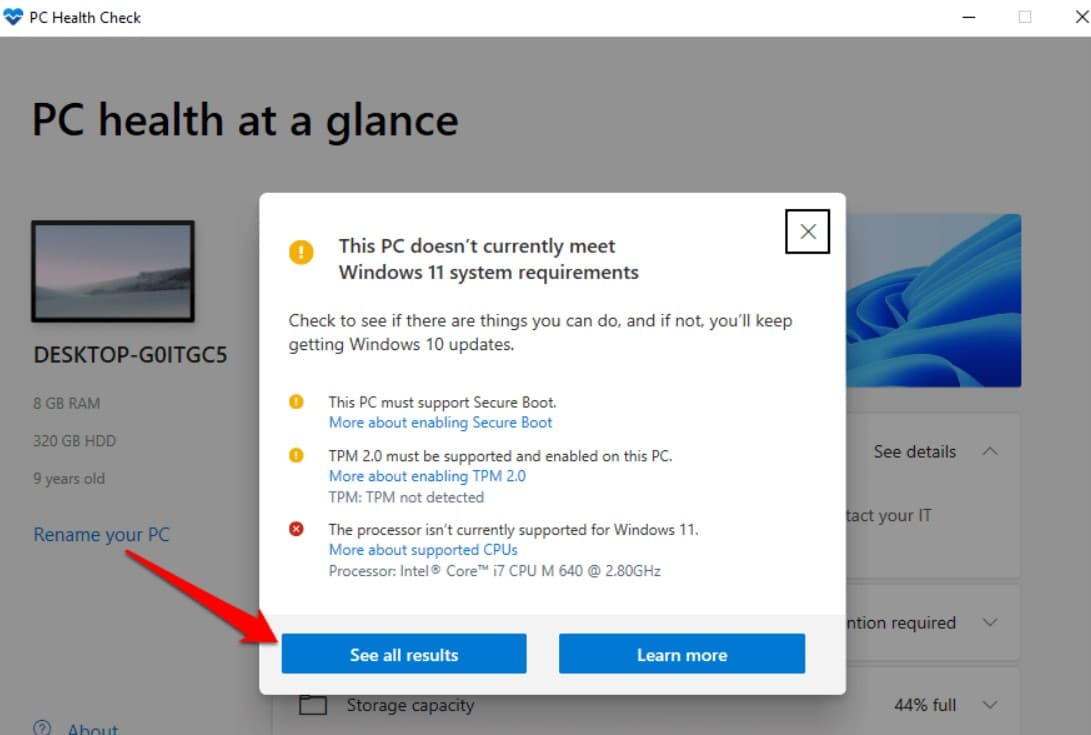
You can download and install Microsoft’s PC Health Check application and run it to check whether your PC meets Windows 11 requirements.
- Download and install the PC Health Check app from Microsoft’s website.
- Launch the app and select the Check now button on the dashboard.
- This will run a quick scan to verify that your hardware and software configuration meet Windows 11 system requirements.
- If the hardware isn’t compatible, you will get a message detailing why the device can run Windows 11.
Enable TPM 2.0 in BIOS for Windows 11
A Trusted Platform Module or TPM is security a chip that’s built directly into the hardware of your device. And enabled this security feature help protect your computer like encrypting your storage drives or using logins like fingerprints or facial recognition.
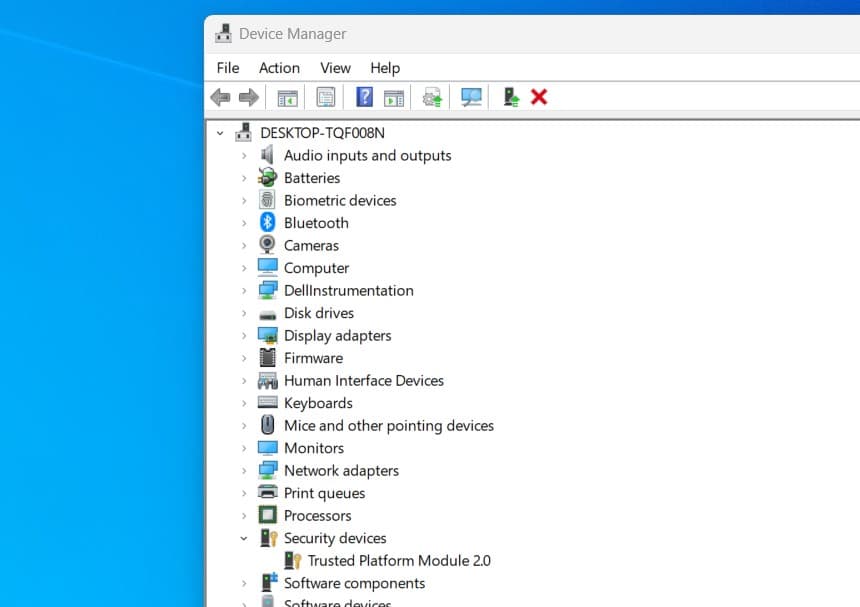
First check if your Pc supports TPM 2.0 to do so open the device manager, and expand the security device. and check It should say Trusted Platform Module 2.0
Or you can press the Windows key + R, type tpm.msc and click ok and check if it says The TPM is ready for use” within the Status section of the window.
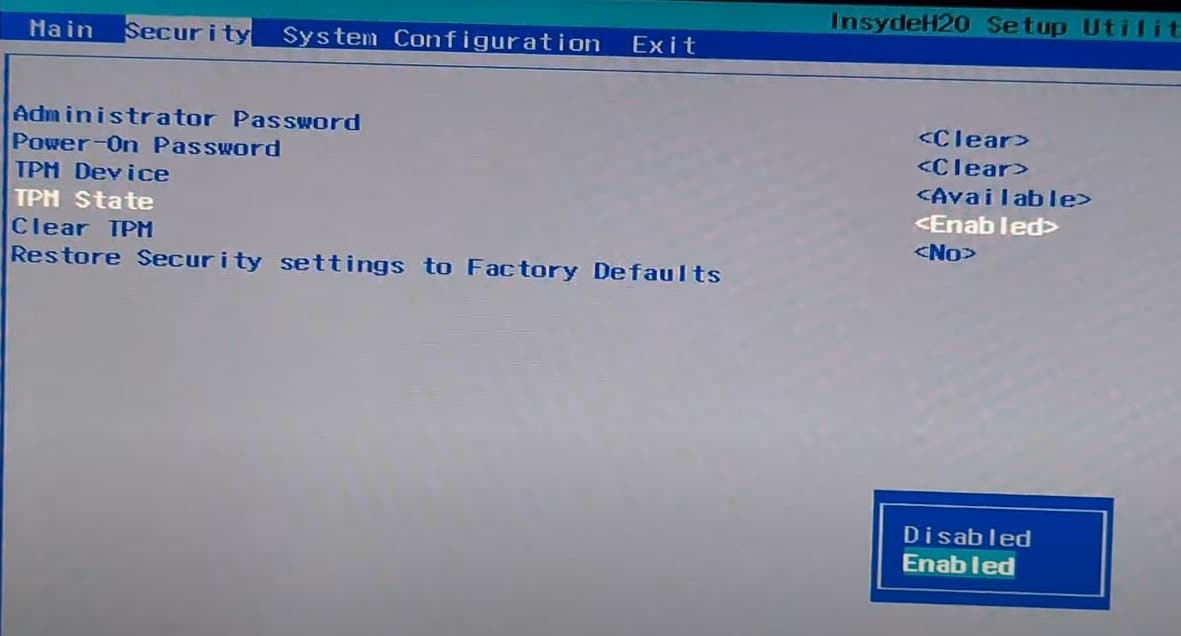
To enable TPM and secure boot
- Restart your computer to access the BIOS settings using Del key or F2 key during startup.
- Go to the Security section, Locate the TPM option and enable it.
- You can press the F10 key to save and exit.
Enable the Secure Boot option
- Open Windows 11 settings and choose Update and Security,
- Click the Recovery option then under advanced startup click on Restart now
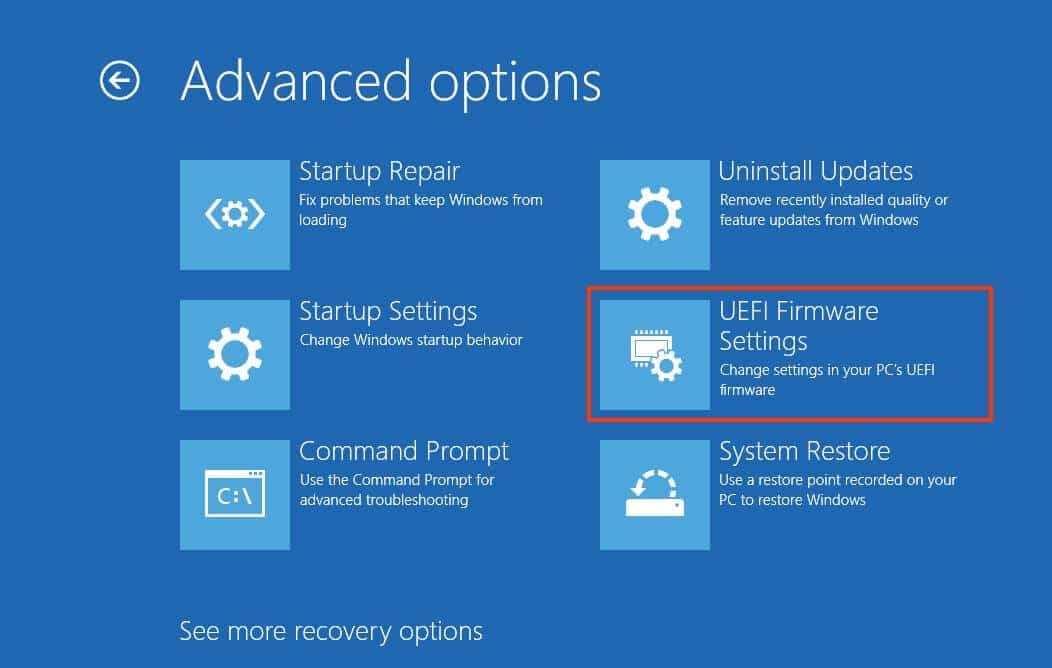
- When you see the boot options, select Troubleshoot, then Click on Advanced options.
- Choose the UEFI Firmware settings option.
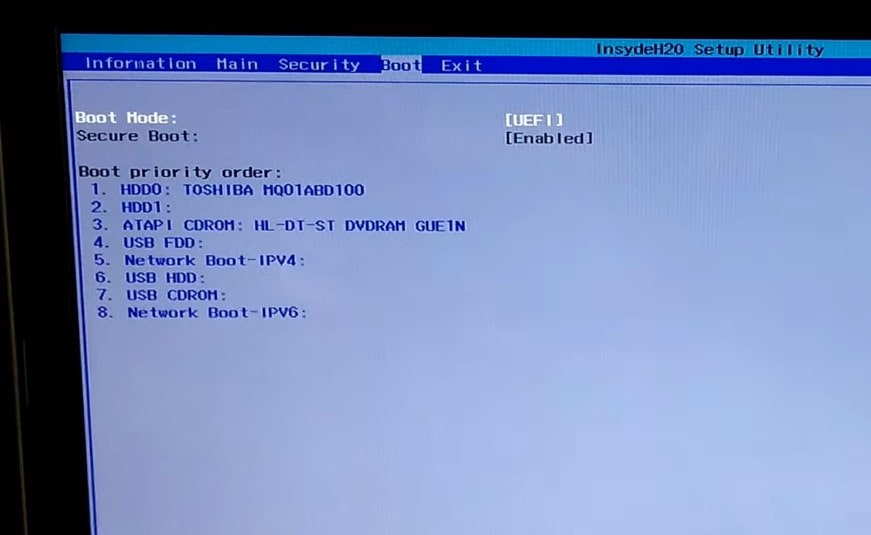
- After your PC gets into BIOS, click on Security, then select the Secure Boot option and toggle On to enable it,
- Save the changes and exit BIOS by pressing the F10 key on your keyboard and wait for pc to reboot.
Check internet connection
You require a stable internet connection to download Windows 11 update files from the Microsoft server and install or upgrade your PC. You can check your internet speed here on speedtest.net or fast.com.
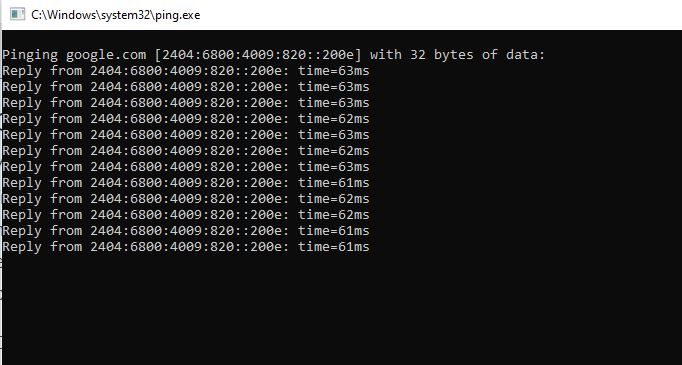
Press Windows key + R, type ping google.com -t, and click ok, check continuously getting ping replay. If it breaks you need to troubleshoot your internet connection.
In addition, Disconnect the VPN if configured on your device and temporarily disable or uninstall third-party antivirus from your computer.
Free Up Storage Space
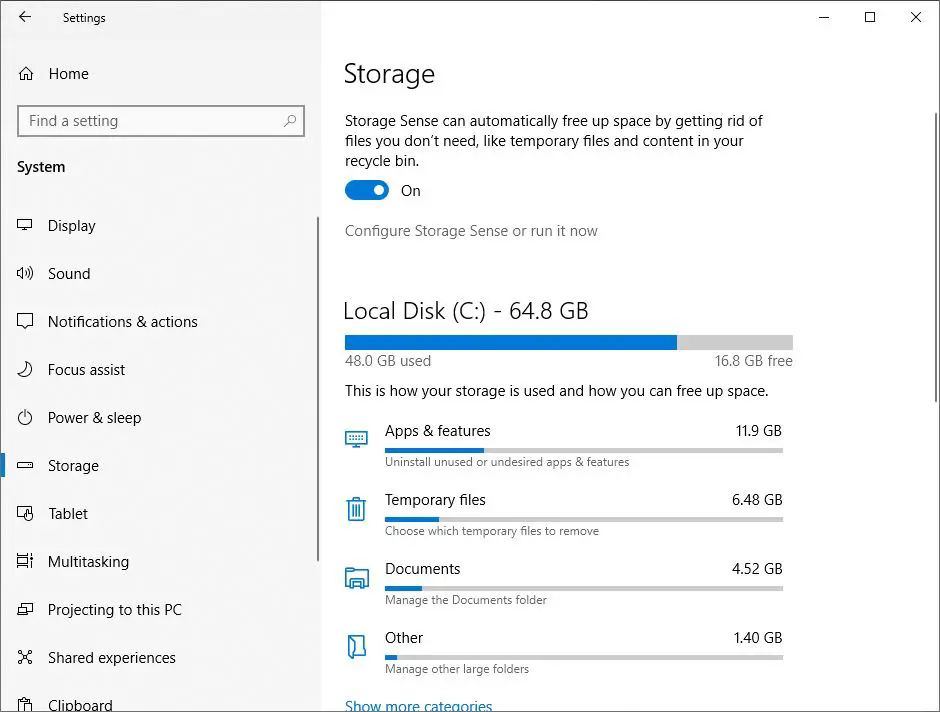
Microsoft’s official latest Windows 11 installation requires 20 to 30GB of free disk space on the system drive. If your PC’s storage is less than required, you may experience difficulty upgrade Windows 11 for free.
We recommend move your download or large files and folders to an external device. Or remove unused data and uninstall Games to free some valuable space on your system drive.
Again you can run Disk cleanup or Storage Sense to Free up space on your PC.
In addition Disconnect external devices such as external HDD, SD Cards, printers, scanners etc before installing or upgrading Windows 11 to prevent any driver conflicts.
Try to install Windows updates on Clean boot state, that help if the startup service conflict causing the issue.
And most importantly check and make sure the Date & time and Region & Language settings are correct.
Run Windows Update troubleshooter
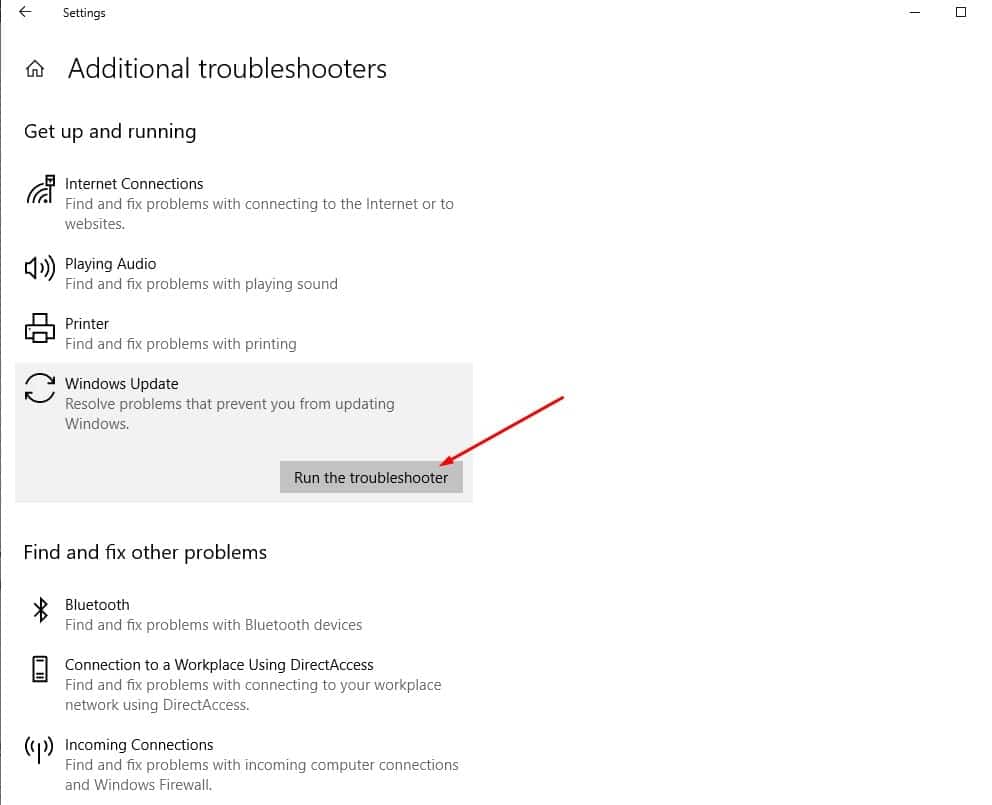
Windows Update Troubleshooter is specifically designed to automatically detect and fix the update process. Let’s run the update troubleshooter and allow Windows to automatically detect and fix if any problem is present there.
- Press the Windows key + X and select settings from the context menu,
- Go to update and security then troubleshoot, and click on the other troubleshooters list,
- This will display all available troubleshooter lists, scroll down and locate Windows Update and click run the troubleshooter next to it,
- This will start to diagnose Windows update related problems,
- Additionally, the troubleshooter checks if the Windows Update service is corrupted or isn’t running. Or Windows Update service is corrupted or isn’t running.
- Once the troubleshooting process completes Restart your PC
- Now again open Windows update and check for updates. Check if there are no more problems upgrade Windows 11 23H2 updates. Still, need help? apply the next solution.
Reset Windows update components
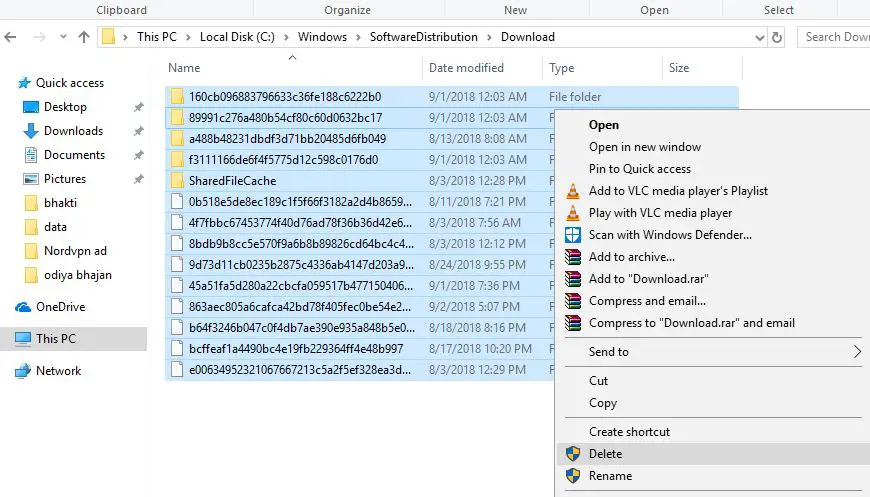
Windows Update folder (C:\Windows\SoftwareDistribution), is the location where Windows stores the new updates after downloading them. If for any reason, any file gets corrupted on the software distribution folder you may face update download and install stuck at any point or a Windows update fail to install with a different error code. Clearing the folder where all of the update files are stored will force Windows Update to download afresh And fix almost every Windows update problem.
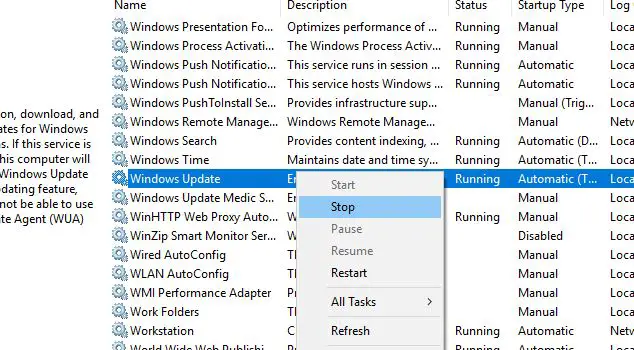
- Open the Windows services console using services.msc,
- Scroll down and locate the Windows update service,
- Right-click on Windows update service select stop,
- Do the same process for BITs service.
- Now Open Windows Explorer using the keyboard shortcut Windows + E,
- Here navigate to C:\Windows\software distribution\downoad folder.
- Delete all files and folders inside the download folder (don’t delete that folder)
- To do this press the keyboard shortcut ctrl + A to select all then hit the delete key.
Run DISM and SFC utility
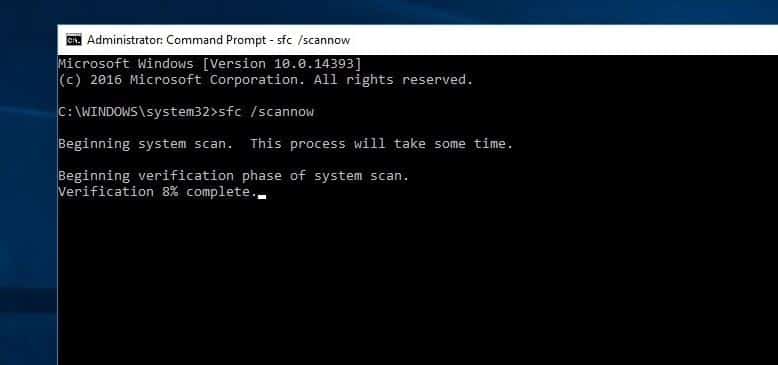
Again sometimes corrupted system files cause Windows 11 updates to stuck downloading. Run the system file checker that scans and fixes corrupted system files on Windows 11.
- Open the command prompt as administrator,
- Here inside the command prompt window type sfc /scannow and hit the enter key.
- this will start scanning for missing corrupted system files if found the SFC utility automatically restores them with the correct one from a special folder located on %WinDir%\System32\dllcache.
Wait until 100% complete the scanning process, Then After Restart Windows and check for updates. If SFC Utility Scan Results found corrupted files but are unable to fix then Run DISM Tool Which enables SFC Utility to Do its job.
Update device driver
Also, Make Sure All Installed Device Drivers Are Updated and compatible with the current Windows version. Especially Display Driver, Network Adapter, and Audio Sound Driver. You Can Check and update Them From the Device manager. Run a Third-party system optimizer like Ccleaner to remove junk, cache, system error, memory dump files, etc and fix broken missing registry errors.
Change DNS address
Apply this solution if the Windows update fails to install with different errors or “we couldn’t connect to the update service” error.
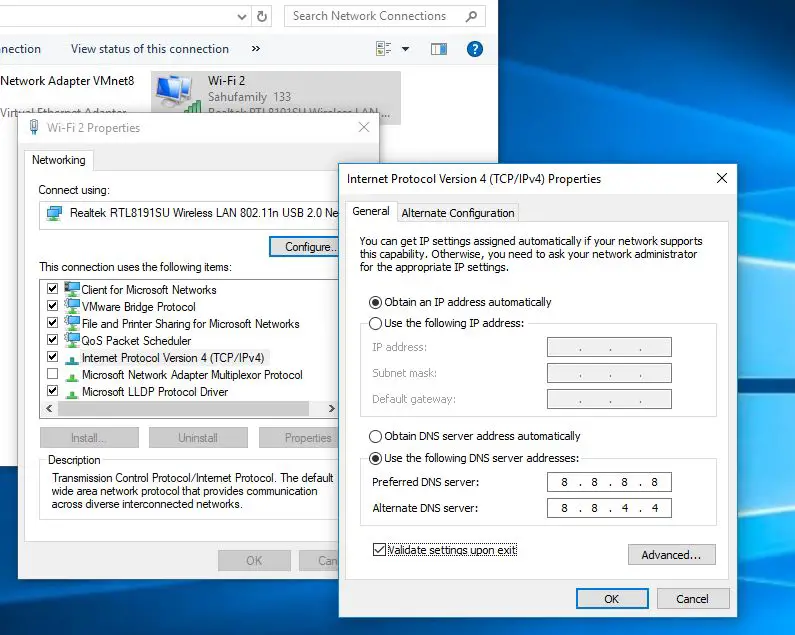
- Press Windows + R, type ncpal.cpl and click ok,
- This will open the network connections window,
- Right-click on the active network adapter and select properties,
- Next double click on Internet protocol version 4 (TCP/IPv4) to get its properties,
- Here change the DSN address primary 8.8.8.8. and alternate DNS server 8.8.4.4.
- Checkmark on validate settings upon exit and click ok
Bypass TPM 2.0 and Secure Boot Checks
If still, the “Windows 11 installation has failed” error persists, tweak the Windows registry to bypass the TPM and Secure Boot checks for Windows 11 installation.
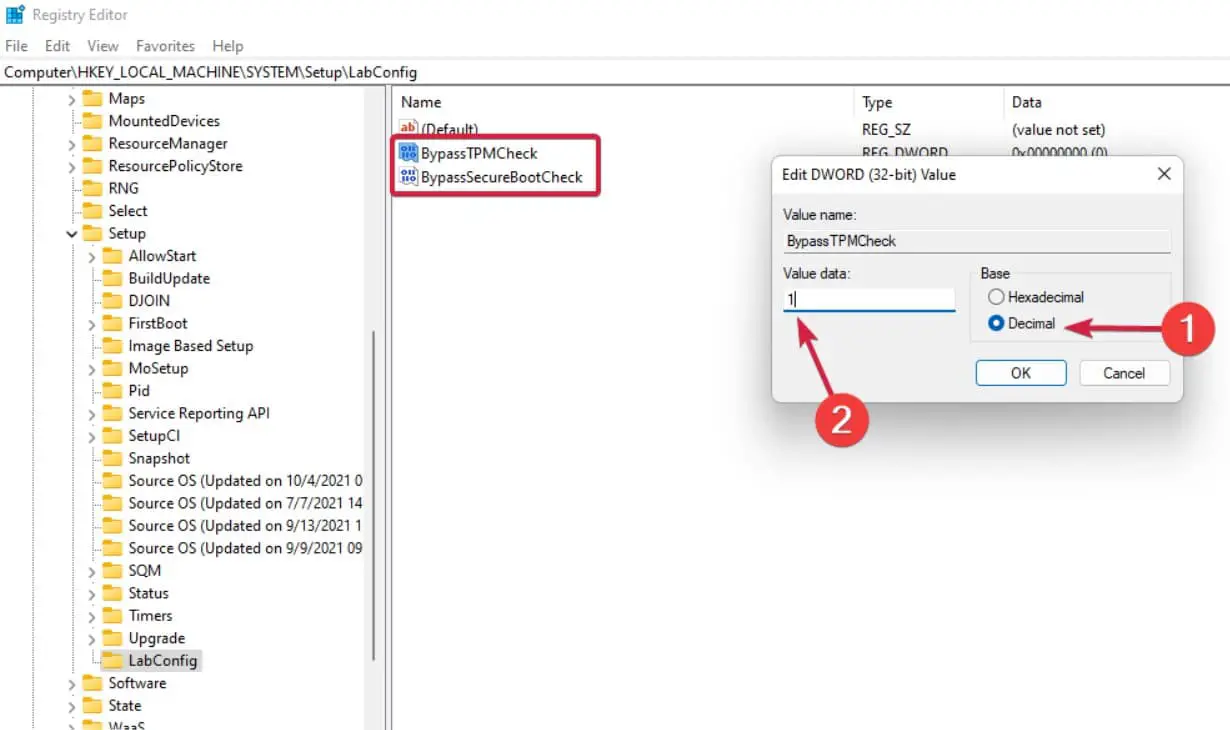
- Press the Windows key + R, type regedit and click ok to open the Windows registry editor,
- Navigate to Computer\HKEY_LOCAL_MACHINE\SYSTEM\Setup
- Right-click on an empty space on the right, select New -> Key and name it LabConfig.
- Right clik on LabConfig key select DWORD (32-bit) Value and name it BypassTPMCheck
- Create one more DWORD (32-bit) Value and name it BypassSecureBootCheck
- Double-click the new items one by one, select the Decimal base, and set 1 in the Value data field, then click OK.
- Close the Registry Editor, then restart your PC. Try to install Windows 11 again.
Also, you can use the official Windows 11 assistant tool to upgrade 23H2 update without any errors. If you are looking for a fresh installation here is how to download Windows 11 23H2 ISO direct from the Microsoft server.
- 2 working methods to fix This PC can’t run Windows 11
- Is YouTube Not Working on Google Chrome? 8 solutions to apply
- Solved: Microsoft edge battery drain issue on Windows 11 Laptop
- Wi-Fi Keeps Disconnecting on Windows 11 (9 ways to fix the problem)
- 5 Best Cybersecurity Tips to Protect Your Windows PC From hackers

