Microsoft rolled out Windows 11 as a free upgrade for compatible Windows 10 devices running version 2004 and later. This is a big update that comes with a number of new features, and improvements to existing ones, security enhancements and more. According to Microsoft Windows 11 is built on the same foundation as Windows 10 and it’s designed to work efficiently on both touch and non-touchscreen devices. If you are interested to grab the Windows 11 free upgrade, Here are a few things to Do Before Updating to ensure you have a smooth Windows 11 installation.
Things to Do Before Updating to Windows 11
In this guide, we’ll walk through backing up your important data, including a digital license, creating recovery media, and disabling software and hardware that might interfere with the upgrade. Use this guide for reference for what you need to do to ensure you have a smooth Windows 11 installation.
You need a Stable Internet Connection to download windows 11 update files from microsoft server.
Ensure your PC is compatible with Windows 11
This time windows 11 needs features such as the TPM (Trusted Platform Module) and Secure Boot. Here are the official system requirements to upgrade your device from Windows 10 to Windows 11 or clean install Windows 11 on a computer.
- CPU: 1GHz or faster or System on a Chip (SoC) with two cores minimum.
- RAM: 4GB.
- Storage: 64GB or larger.
- Firmware: UEFI with Secure Boot capable.
- TPM: Trusted Platform Module (TPM) version 2.0.
- Graphics: Compatible with DirectX 12 or later with WDDM 2.0 driver.
- Display resolution: High definition (720p) display greater than 9 inches diagonally, 8 bits per color channel.
If you plan to upgrade to Windows 11 Home, an internet connection will be required to complete the initial setup.
In addition, you must be running a Genuine copy of Windows 10.
Check If your device supports TPM 2.0
Trusted Platform Module provides your operating system with a secure and dependable place to execute cryptographic functions, it’s an essential part of the process. Here is how to find out if you have the necessary TPM on your device.
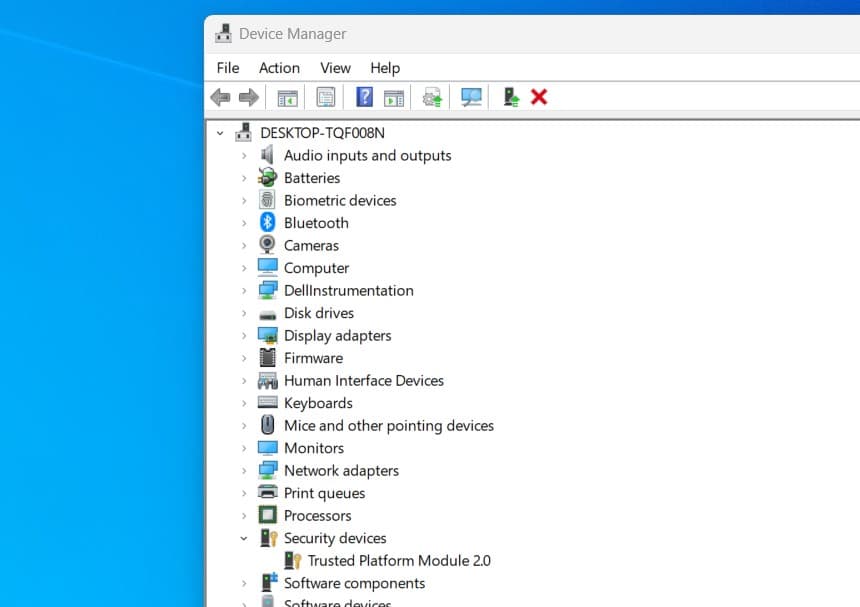
- Right-click on the Windows start button and choose Device Manager.
- This will display all installed device driver lists, expand the arrow next to Security Devices
- It should say Trusted Platform Module 2.0. If it doesn’t, then you’re out of luck.
Enable Secure Boot
Similar to TPM, Secure Boot is also a security feature that ensures that the system boots only a trusted operating system. Here is how to check or enable Secure Boot on your PC.
- Press the Windows key + X and select Settings
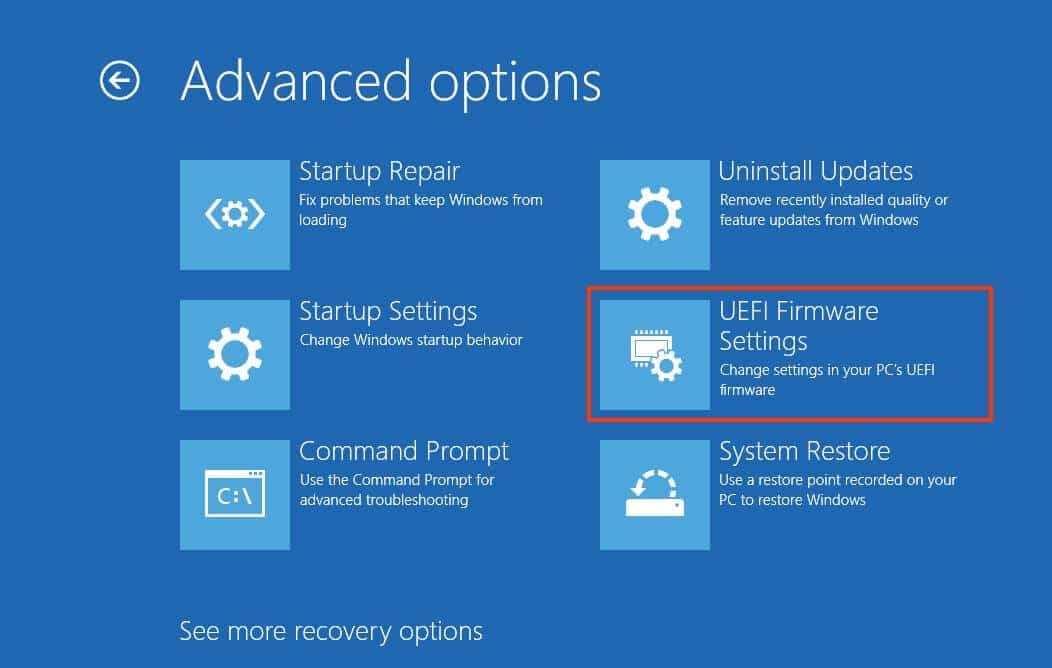
- Navigate to Update & Security then Recovery and under Advanced Startup click on Restart now.
- Go to Troubleshoot > Advanced Options > UEFI Firmware Settings > Restart > Boot.
- Change Secure Boot status to Enabled.
Run the Microsoft PC health check tool
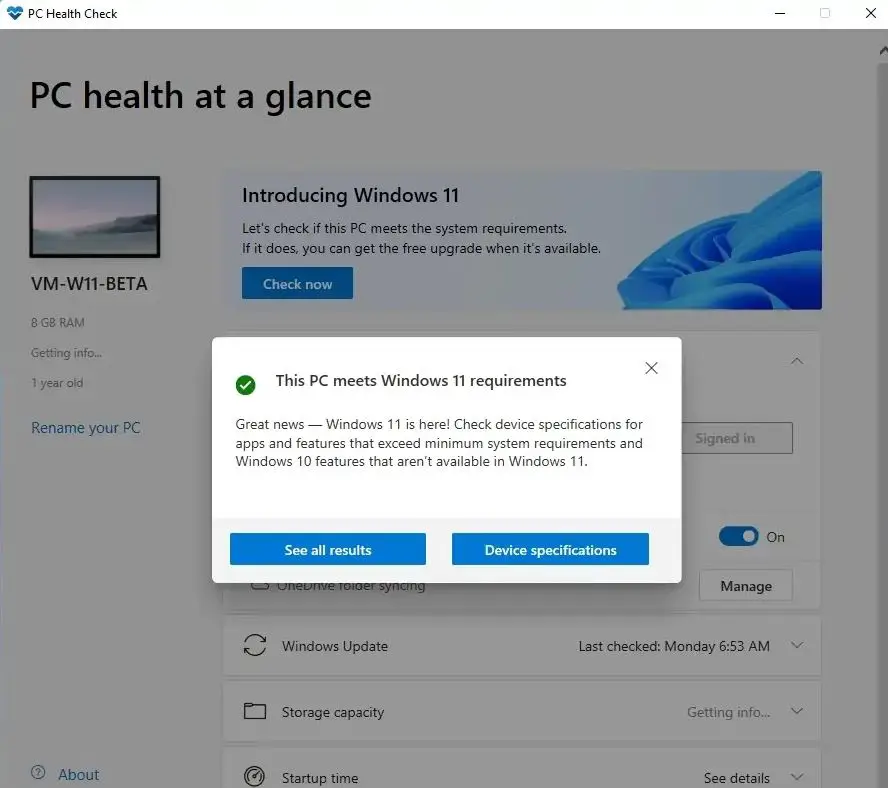
The easy and most recommended way to check whether your device passes Windows 11 system requirements or not is, to download and run the PC health check tool.
- First, download and install Microsoft’s PC Health Check application
- This will check and display the result if this PC meets Windows 11 requirements or not.
- If the hardware isn’t compatible, you will get a message detailing why the device can run Windows 11.
Backup your important data before upgrading to Windows 11
It’s always a good idea to back up your data before you install any big OS update. It’s more necessary if your PC is old and it had issues with the previous updates. You can upload your photos or important files to other hard disks, cloud service (OneDrive) or external drive.
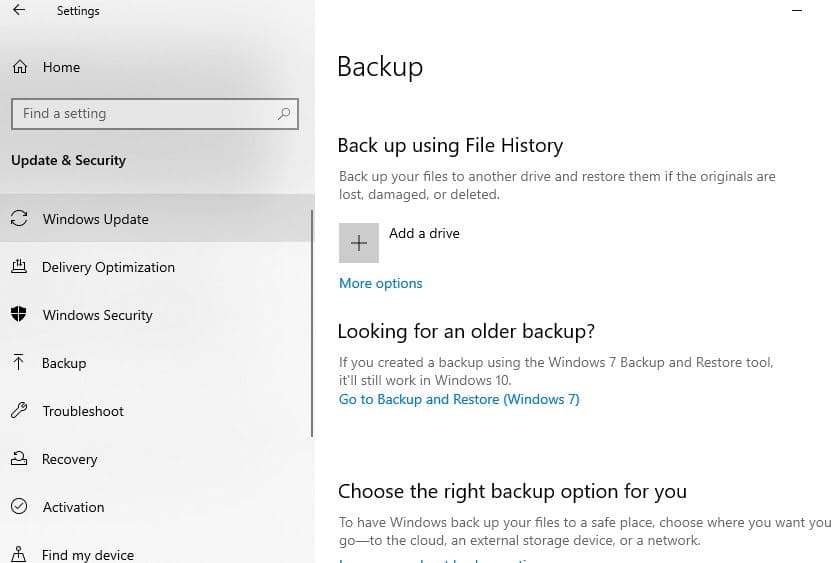
Microsoft has developed a backup tool for Windows 10 that lets you save your important data to an external hard disk. It can be found by going to Settings > Update & Security> Backup.
Note down software licenses
Applying the Windows 11 update should be painless, but sometimes In a worst-case scenario, something might go catastrophically wrong during the upgrade, leaving your system so messed up that it no longer boots. In that case, you’re looking at reinstalling Windows and starting from scratch—oomph!
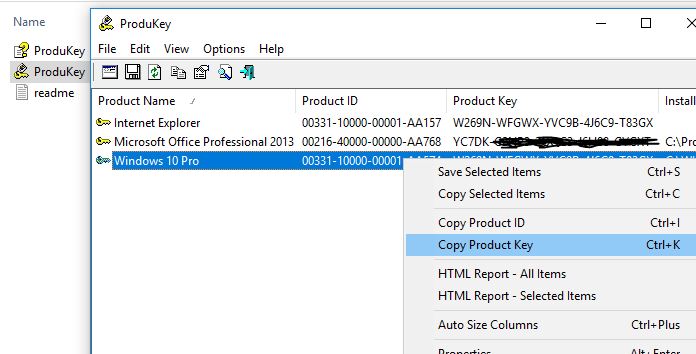
That shouldn’t happen, but if it does, you can do yourself a solid by having any applicable software licenses handy. Magic Jelly Bean’s free KeyFinder program will look up your Windows license and many other keys. Write down any keys you might need if starting over, or snap a picture with your smartphone.
Have Free Disk space to Download and install updates
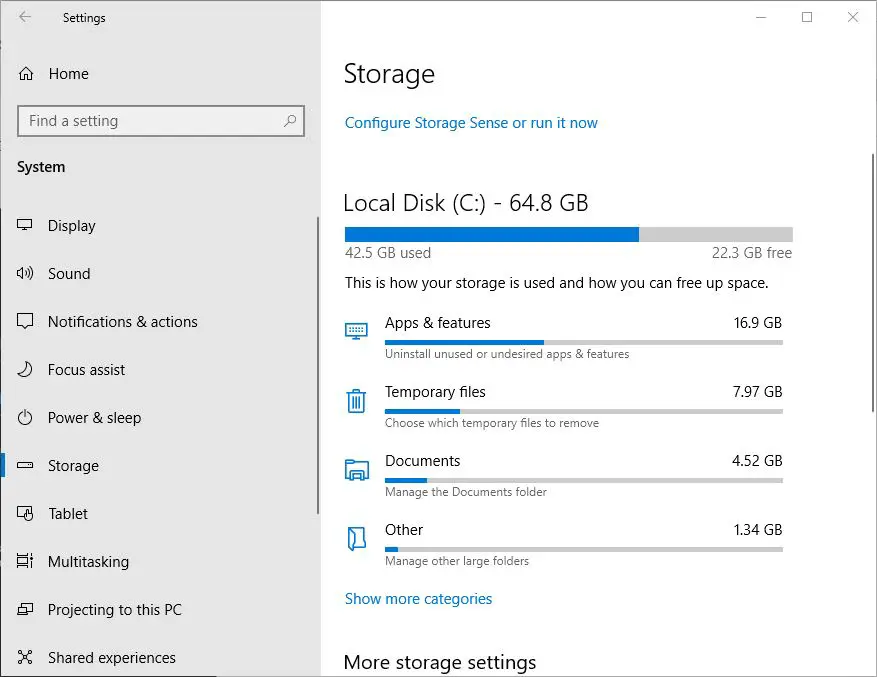
Make sure you have enough disk space on your C:\ drive to download the big update. Microsoft recommends 20 to 30 GB of free disk space for download Windows 11 update files to the local driver before apply them.
Uninstall apps on Windows 10
Uninstalling unwanted games and programs is one way to clear up storage space if you’re running low.
- Press the Windows key + X and select Apps and Features,
- Under the “Apps & Features” section, select the app (or game).
- Click the Uninstall button, and click it again if prompt for confirmation.
Run the Disk Cleanup tool
Beyond that, you can free up storage using the Disk Cleanup tool that’s built into Windows 10.
- Just type “Disk Cleanup” into search, or right-click your C:\ drive and select Properties > General > Disk Cleanup.
- The Disk Cleanup tool rids your system of temporary files, dumps your Recycle Bin, and optionally removes other files, such as memory dumps from system errors.
- Depending on your system, you can potentially free up several gigabytes of space.
If you are running the latest Windows 10 Check how to Use Storage Sense To Automatically Free Up Space In Windows 10
In case you can you prefer third-party software, you have some free options like CCleaner.
Disable Peripherals and External USB Devices
If you are performing an offline upgrade using USB media. Common USB storage devices such as external hard disks can also confuse setup, so, if you have those attached, disconnect them. The same goes for peripherals such as your printer, webcam, microphone, scanner or other unnecessary gadgets attached to it.
The best recommendation is to have a simple configuration, no more than a keyboard and mouse. This would help Windows update the system without trying to update the drivers for these devices.
If you have an SD card reader, eject your media before upgrading.
You can also uninstall your SD card reader as n extra measure.
- Press Windows key + X > Device Manager > Memory technology devices.
- Right-click SD Controllers, then click uninstall.
- If there is more than one, right-click each, then click Uninstall.
Once your PC is updated, you can reconnect your peripherals and let Windows find the drivers for you or you can get it from the manufacturer’s site if you face any issues.
Uninstall Your Antivirus Utility
Agin security software remains one of the most common causes of issues during major operating system upgrades. After all, it’s doing what it’s supposed to do: blocking changes to your system configuration. Antivirus software will sometimes detect and assume an unexpected update making a major modification to system files might be an attack in progress.
The same goes for software such as your firewall. To avoid false positives, Microsoft usually recommends updating the antivirus software before upgrading; you could try your luck and see if it works. If it doesn’t, then you likely know the reason why. I would like to recommend simply uninstall the antivirus protection. After the upgrade is complete, you can always reinstall your antivirus utility.
Update Display Adapters
Make sure all of your hardware is up to date with the latest drivers and firmware. In some cases, there may even be driver updates that add or enhance functionality in the Windows 11 upgrade.
On major updates, such as this, it might even be a good idea to download the latest version of your network drivers first. Sometimes a major system update can render you without network connectivity and no way to grab a new set of drivers. Better yet, download all your drivers in the standalone format first!
Your display adapter can actually be an upgrade blocker, too. This commonly occurs when you see a black screen during the installation then setup automatically rolls back.
Uninstalling your video card driver is known to help. Also, if you have multiple displays connected, only keep one attached for the duration of the installation. In some cases, updating the video card driver to the latest version can help too.
Connect to a UPS, Ensure the Battery is Charged
Normally windows 11 download takes more than 20 minutes to download (it depends on your internet speed ) and ten to twenty minutes to complete the installation process. So, make sure your laptop’s battery is working and charged up, and if you are upgrading a desktop, connect it to a UPS. There’s nothing more disastrous than an interrupted Windows update.
Disconnect from the Internet When Using an ISO
If you plan on using the ISO media to upgrade, disconnect from the Internet during setup. There are multiple ways to do this: you can disconnect the Ethernet cable manually, or if you are connected to a wireless network, you can manually disable Wi-Fi by turning off the Wireless switch on your laptop.
An easier way to do it is to open Action Center (press Windows key + A), then click Airplane Mode. This will disable all network technologies. Proceed with the upgrade.
If you are updating through Windows Update when the download reaches 100% disconnect from the Internet LAN (Ethernet) or Wi-Fi then proceed with the installation.
Run these Commands to Resolve Any System Integrity Issues
The Deployment Image Servicing and Management (DISM) command is a handy diagnostic tool for resolving file integrity issues that might prevent a successful installation. Users can run the following commands as part of their prep routine before initiating the upgrade.
Press Windows key + s and type cmd, Right-click on the command prompt select run as administrator,
Now type the command Dism /Online /Cleanup-Image /RestoreHealth and press enter key to execute the same.
Another command you should run is the cleanup driver.
rundll32.exe pnpclean.dll,RunDLL_PnpClean /DRIVERS /MAXCLEAN
Also run the System file checker utility command sfc /scannow which checks for missing, corrupted system files, If found any the utility will restore them from a compressed folder located on %WinDir%\System32\dllcache
Restart your computer when complete. This should help with the notorious failed or non-responsive installation during the driver migration.
Check Windows 11 is ready for your device
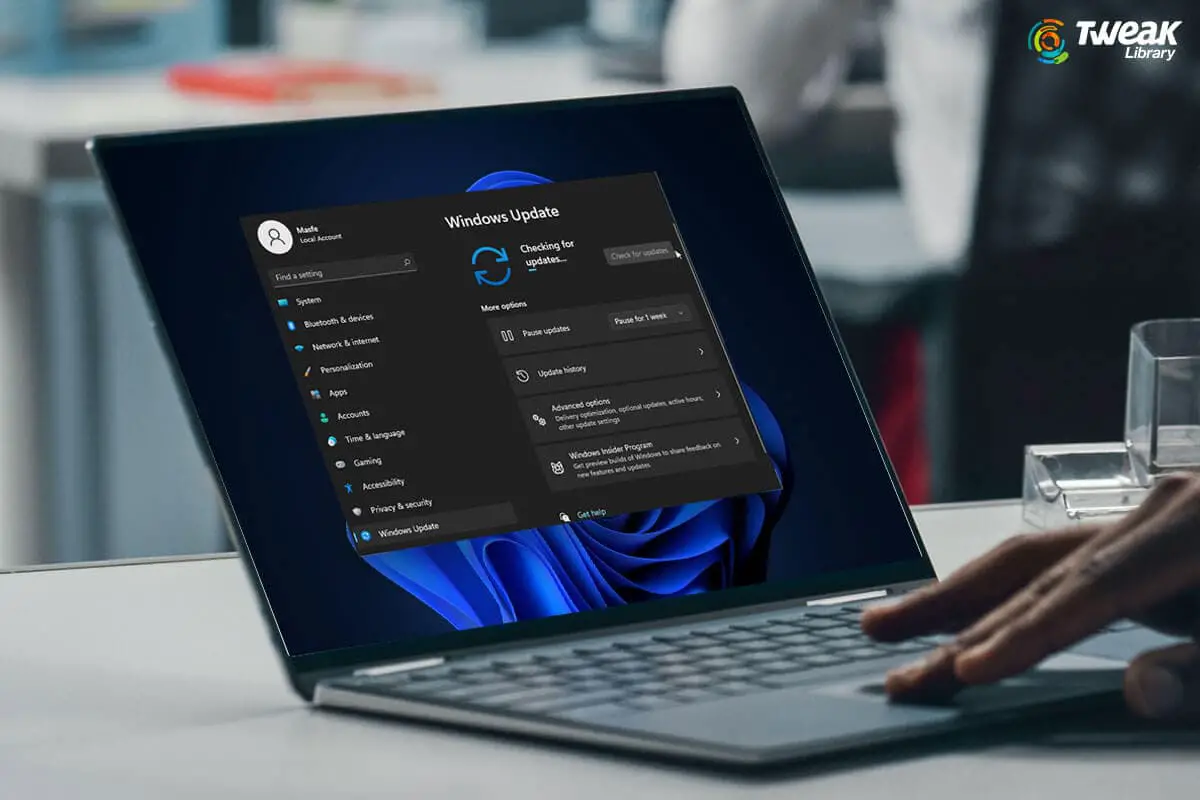
To check if Windows 11 is ready for your device,
- Go to Start > Settings > Update & Security > Windows Update and select Check for updates.
- If the upgrade is available for your device and you want to proceed, download and install it.
Windows 11 upgrade stuck downloading
You have prepared everything and you may notice the Windows 11 update download stuck at any specific point for a long time. That cause make sure your internet connection is working properly, and wait some more time to complete the download process.
If you notice still there are no improvements then
Reset Windows update cache
- Press the Windows key + R, type services.msc and click ok,
- This will open the Windows service console, scroll down and locate the Windows update service, right-click on it select stop,
- Now press the Windows key + E to open File Explorer and navigate C:\Windows\SoftwareDistribution\Download
- Here delete all files and folders inside the download folder, to do so, press the Windows key + A to select all and hit the Del key.
Again open Windows services and restart the service that you previously stopped.
Windows update troubleshooter
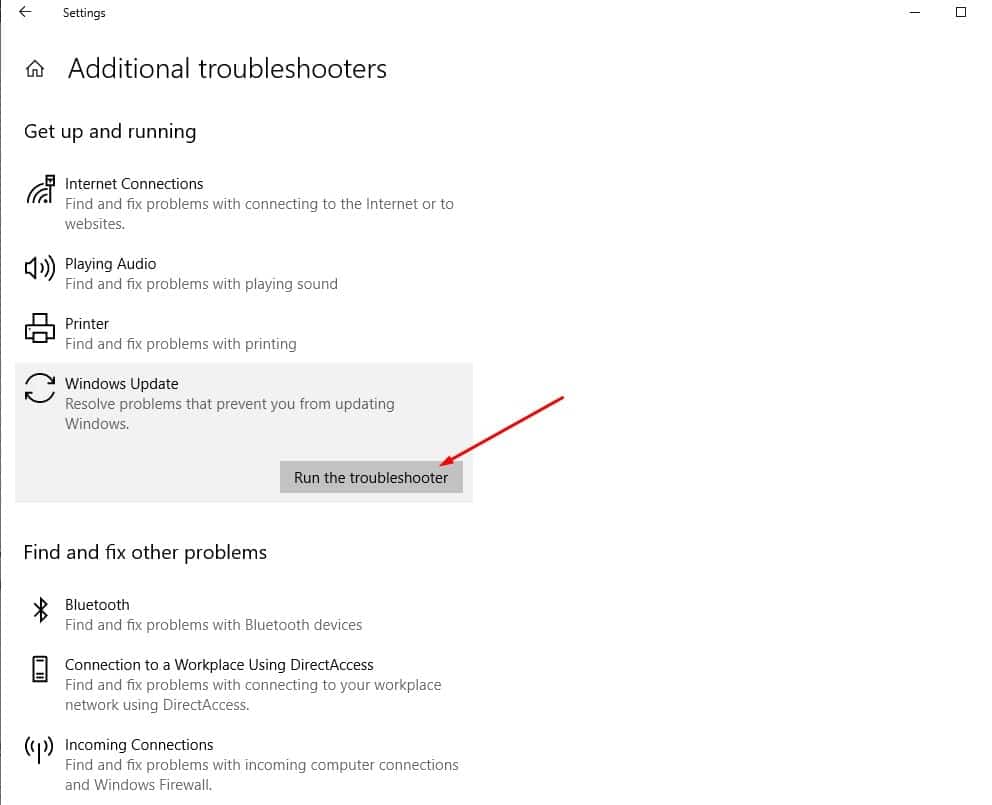
Run the built-in Windows update troubleshooter that automatically detects and fixes problems that may prevent Windows 11 upgrade.
- Press the Windows key + X and select settings,
- Go to update and security then troubleshooter and click on the troubleshooter link,
- This will display all available troubleshooter lists, locate Windows updates, and click run the troubleshooter.
- Follow on-screen instructions and let Windows check and fix any basic problem causing the issue.
After that restart Windows and check for updates from settings -> update & Security -> Windows update -> check for updates.
Also read:
- How to Upgrade Windows 7 to Windows 11 for FREE (Without Data loss)
- How to Speed Up Microsoft Edge Browser on Windows 10/11 (Updated)
- windows 11 wireless display not working? Apply these 4 solutions
- Microphone not working or Keeps Muting Itself? 5 solutions to apply
- Best Free and paid VPN for Windows 11 (Up to 82% discount + 3 months free)
